Plantings
In GeoGardenClub, a "Planting" defines one or more plants of the same Crop and Variety that are growing in a single Bed and have (approximately) the same timing data (i.e. sow date, transplant date, pull date, etc.). So, for example, let's say you planted six Big Boy tomato plants, and you planted all of them in the same Bed on the same date. You would define a single Planting for all six tomato plants.
Create a planting
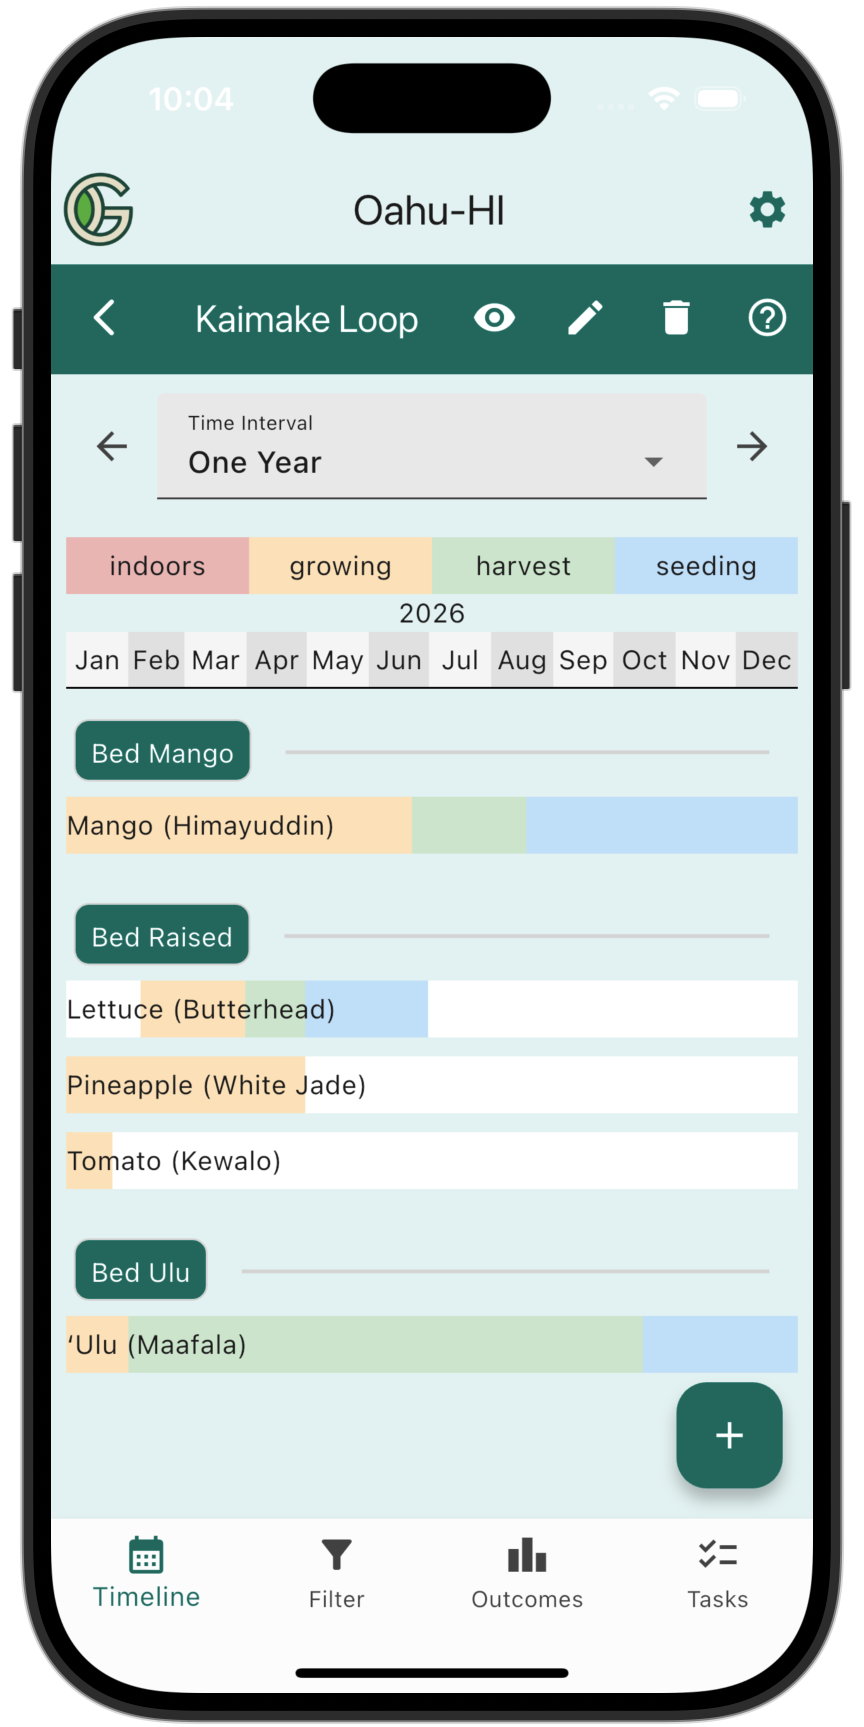
To define a Planting, first go to the Garden view of your Home screen, then tap the Details button for the garden, which takes you to the Timeline view of the Garden Details screen. For example, here is the Timeline view in the Garden Details screen for an example garden:
Now tap the "+" button, which gives you the option to define a new Bed, Planting or Observation:
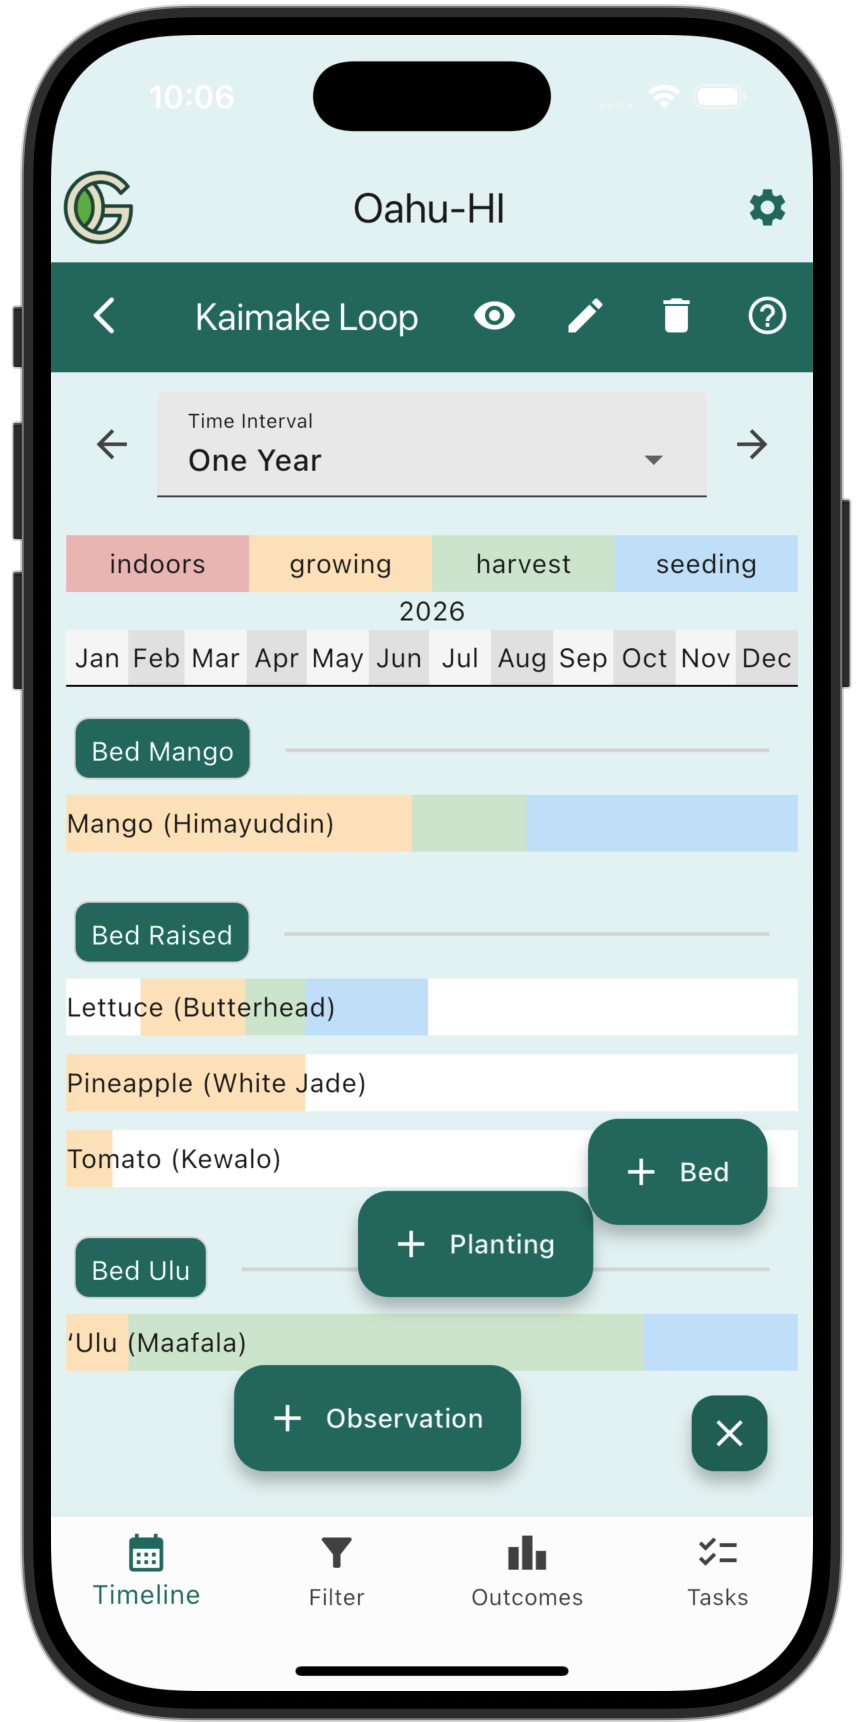
Tap the "+ Planting" button to bring up the Create Planting Screen, which enables you to provide "Basic Info" about a new Planting:
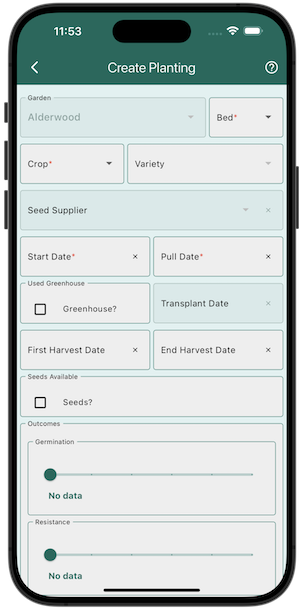
Garden: A pull-down list of all of your Gardens. When you get to this screen from Garden Details, it is initialized to the garden you were in.
Bed. A pull-down list of the Beds in this Garden. Select one. (If you haven't defined the appropriate Bed yet, then press the back button to navigate back to the Garden Details page. Then press the "+" button and select "+ Bed" to define the bed you need.)
Crop: A pull-down list of all currently defined Crops. If you are planting a Crop that does not appear in the dropdown menu, you can tap the "+" button to the right of the Crop menu to define a new Crop.
Variety: A pull-down list of all Varieties currently defined for this Crop. All Crops have, by default, a Variety named "Unknown". If you don't know the Variety at this time, select "Unknown".
Sow Date Unknown: Check this box if, for example, you bought a starter plant from a store so you don't know when the seed was planted. If this box is checked, then Sow Date is disabled and you must use Transplant Date to indicate the day you plan to put the starter plant in the ground.
Perennial: Check this box if the plant is a perennial. In this case, the Sow Date is initialized to the first day of the year, and the Pull Date is initialized to the last day of the year. (You create a new Planting each year for perennials so you can track their harvest dates and quantities on a yearly basis.)
Transplant Date. For starter plants, or for plants you start from seed indoors and then later transplant, use Transplant date to indicate the day you plan to put them in your Bed.
First Harvest Date (optional): Once you have your first harvest, you can add the date here. We recommend that you add an expected date of first harvest so that the system can auto-generate a First Harvest task. You can update the task if your estimate is off, and by completing the task you record the actual date of first harvest.
Last Harvest Date (optional): If you have a Planting that you expect to save seeds from and requires some time between the final harvest and seed collection time, you can add the date you expect to stop harvesting here. You can update this to the actual date you finished harvesting the Planting when you complete that task. Otherwise, the Pull Date is assumed to be the End Harvest Date.
Pull Date: Add the date you expect to pull your Planting from the ground. You can update this to the actual date the Planting was pulled when you complete that task. For perennials, you can specify a pull date as the last day of the year.
Absolutely! In fact, it's better to guess a date than to leave it empty. That's because when you supply a date, GGC will auto-generate a task that will become due on that date. That becomes a kind of "reminder" so that when the task becomes due, you can change your guesstimate to the actual date.
The following screenshot illustrates how a Planting of Arugula might be defined when you don't yet know what variety of Arugula seeds you'll be planting:
Tap Submit to create this Planting and return to the Planting Timeline View. If you now tap the timeline bar associated with this Planting, you will see the Planting Details screen.
Planting Details
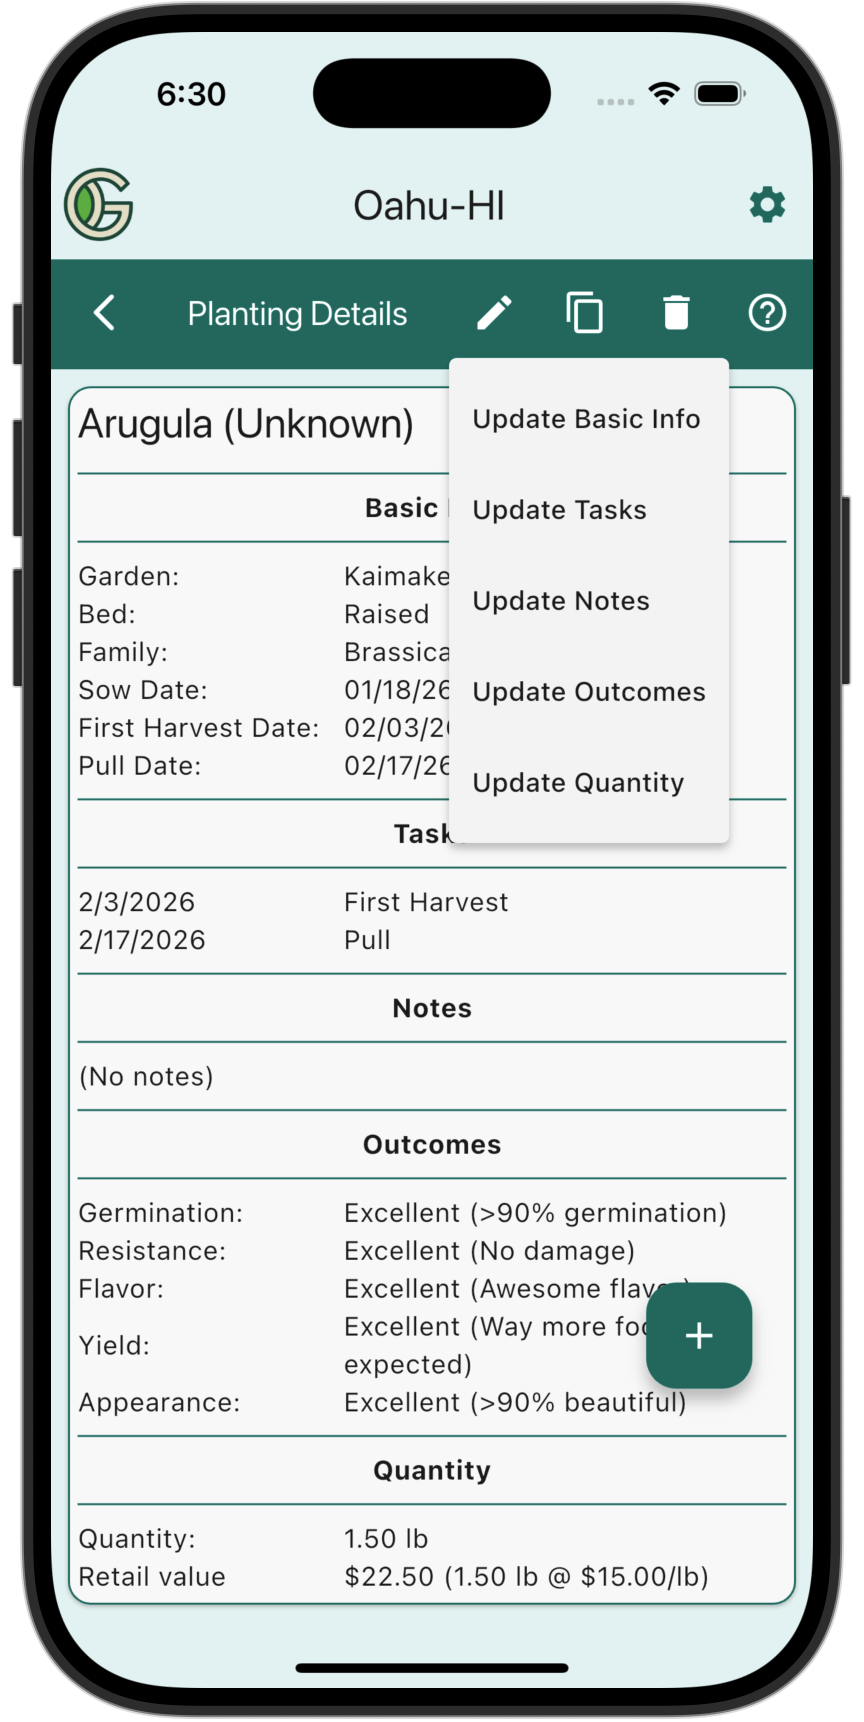
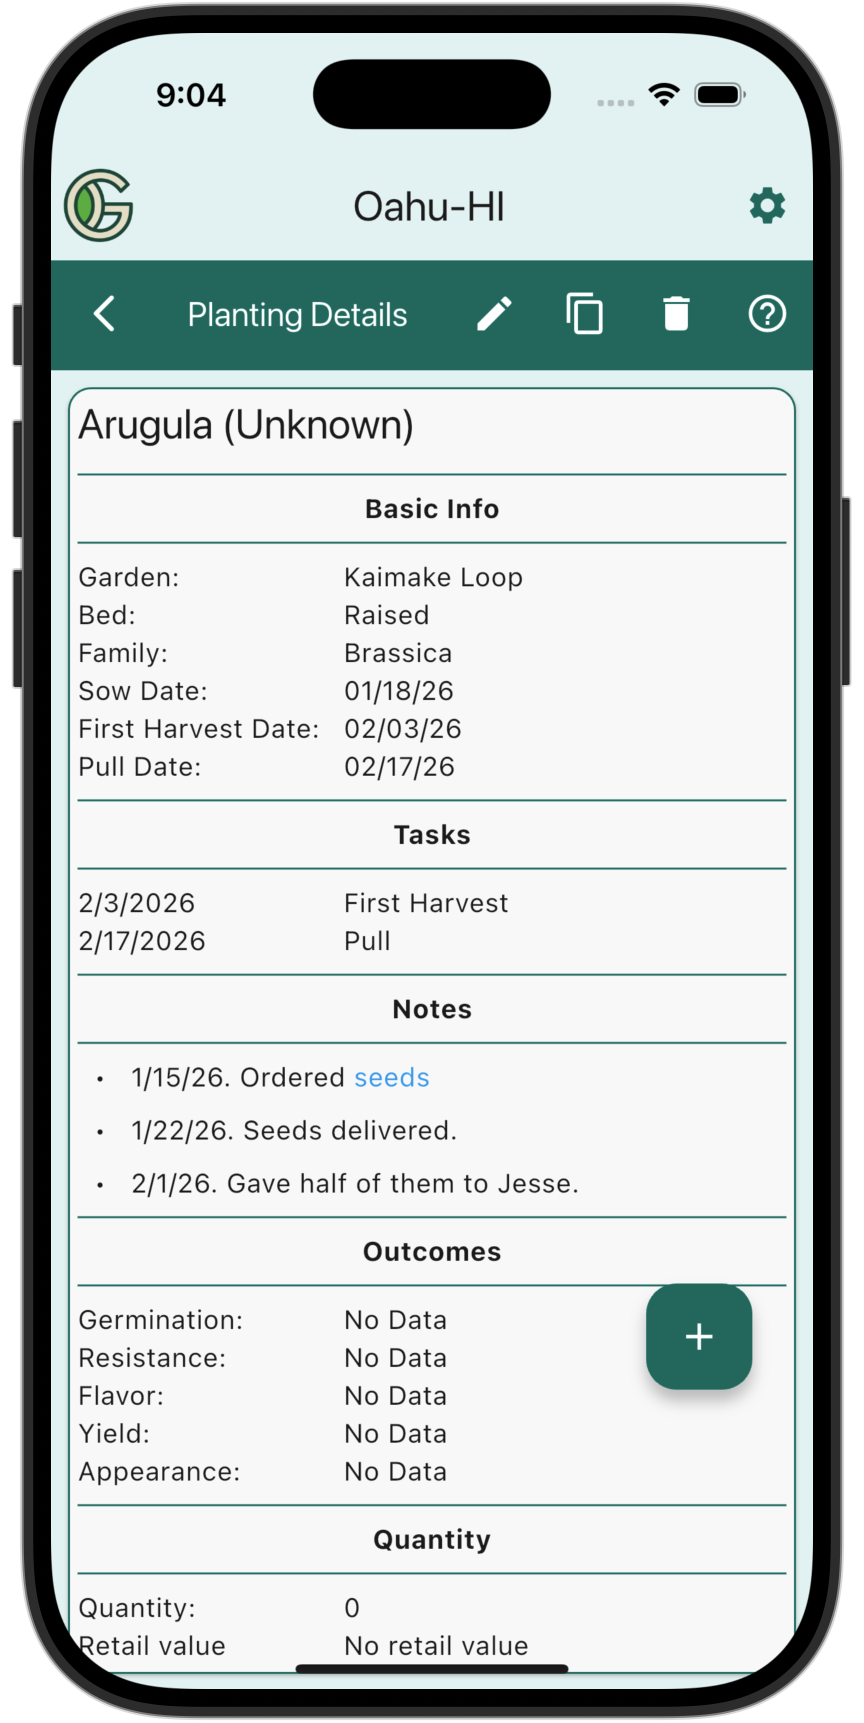
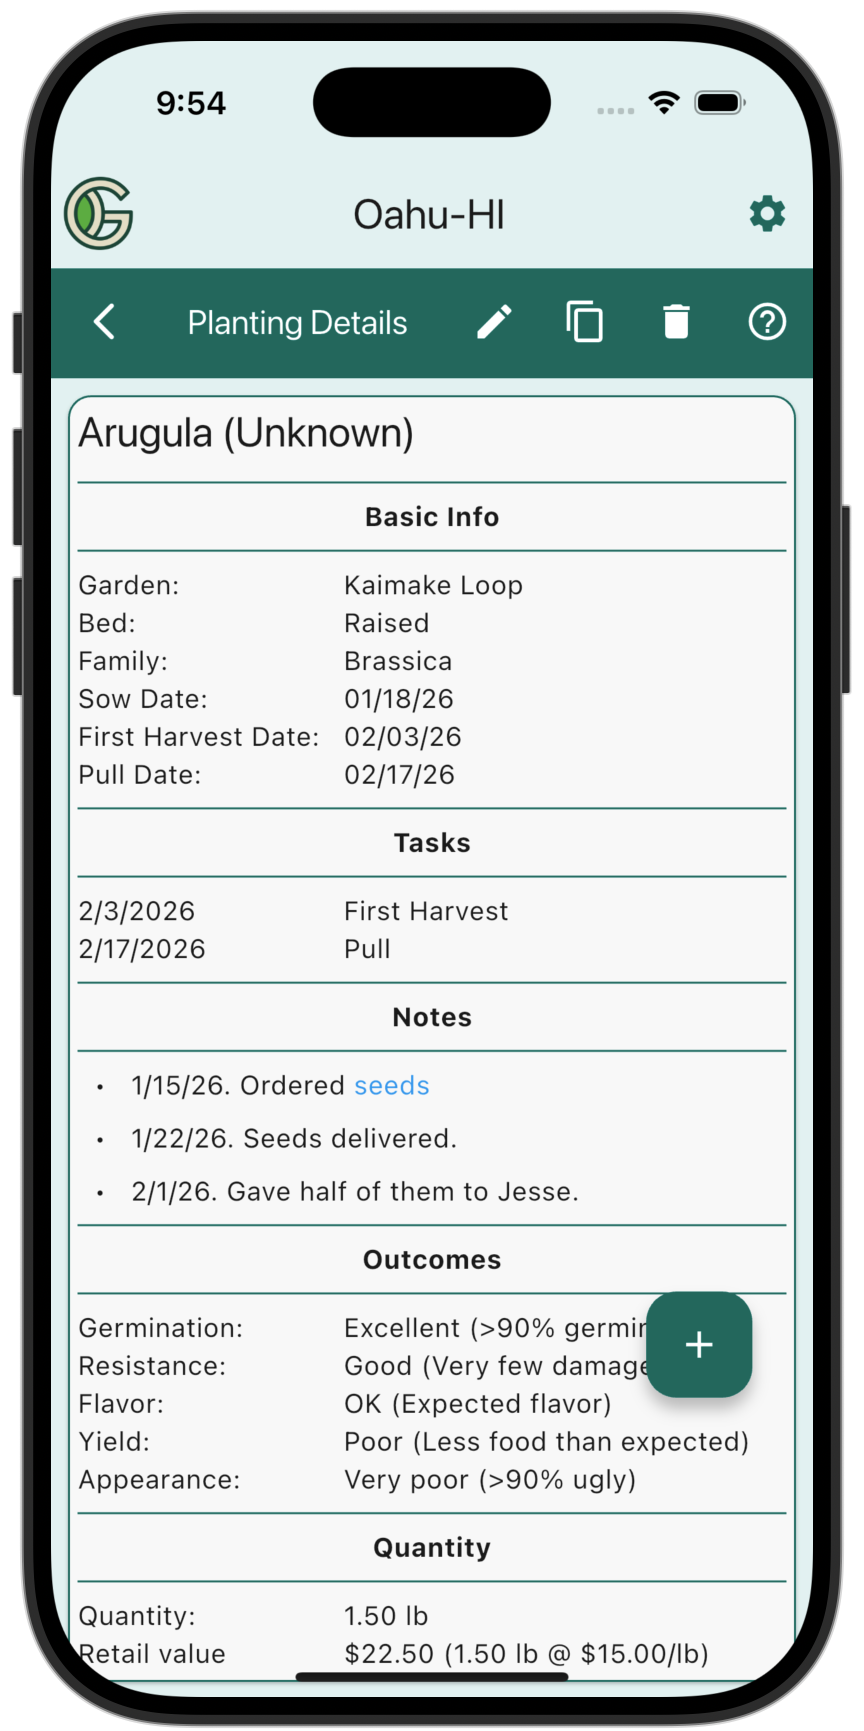
The Planting Details screen provides a summary of all the data collected about a single Planting. Here is what the Planting Details screen would look like for the Arugula planting we defined above:
The Planting Details screen reveals that a Planting consists of five sections: Basic Info, Tasks, Notes, Outcomes, and Quantity.
Update Planting
You can update any of the five sections of a Planting. First, tap on the pencil icon near the top of the screen to reveal the Update Planting menu:
Update Basic Info
Tap "Update Basic Info" to edit the Basic Info section:
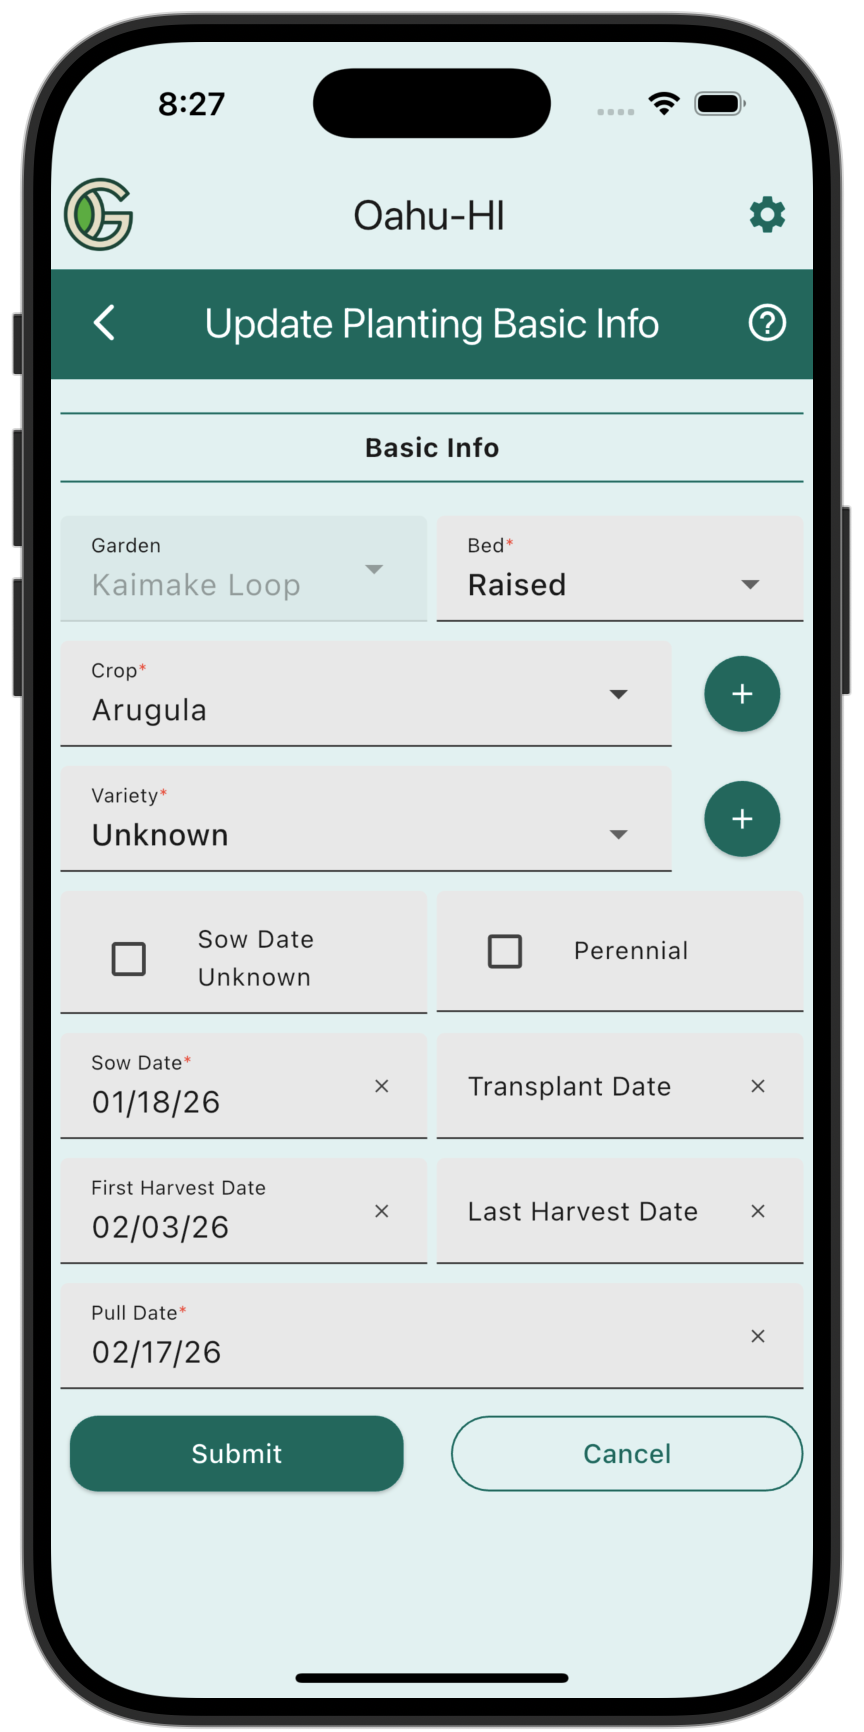
This is the same form you use to Create (or Copy) a Planting. You can use this to adjust the dates, or indicate the variety once you know it.
Update Tasks
Tap "Update Tasks" to edit the Tasks associated with the Planting:
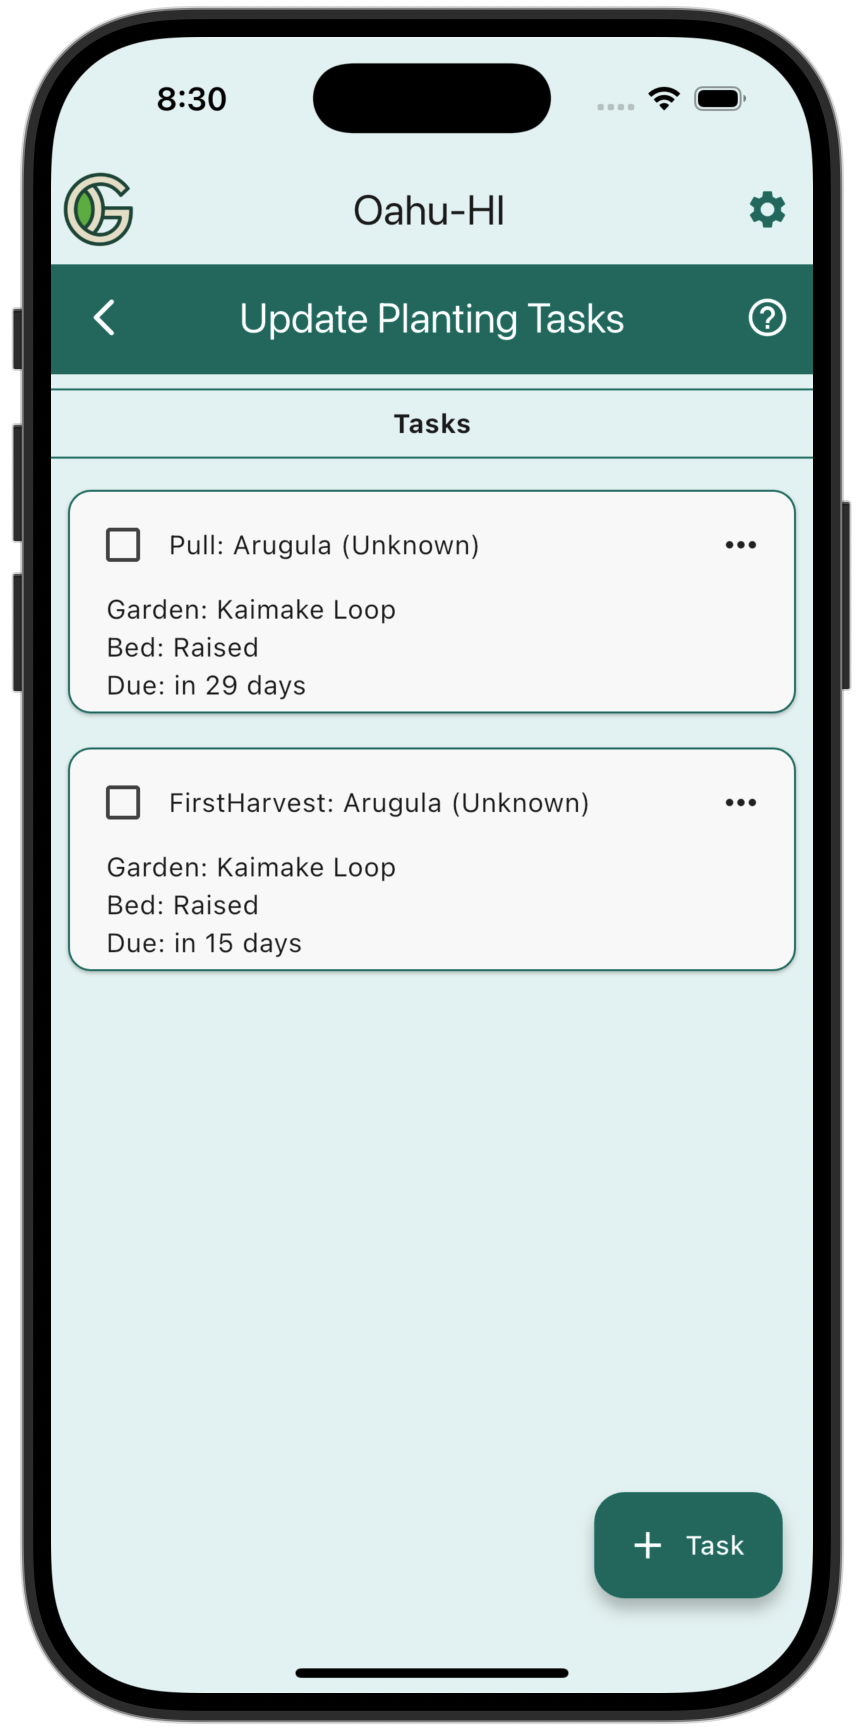
From this screen you can edit the dates associated with any Tasks, create a new one, delete a Task, or mark it as completed. See the Tasks page for details.
Update Notes
Tap "Update Notes" to edit your notes about this Planting:
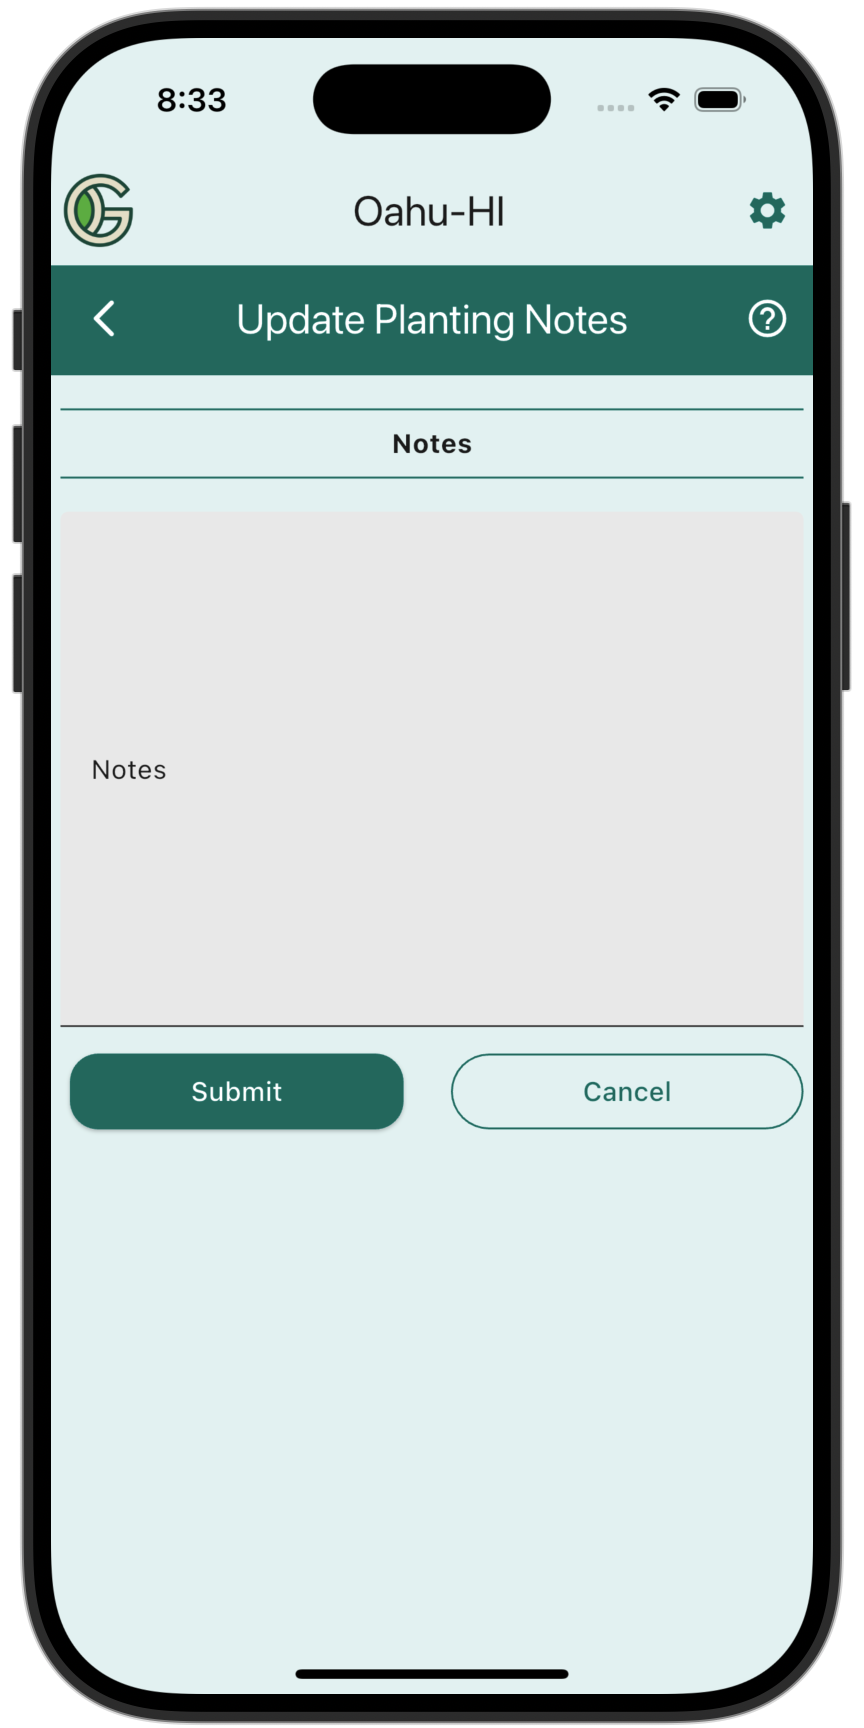
Use this field to provide any supplemental information you want to associate with this planting.
While you can enter your notes as plain text, you can also use Markdown to create lists and other text formats. For example, if you wanted to create an itemized list of notes including a link to the website page where you ordered the seeds, you might enter something like this:
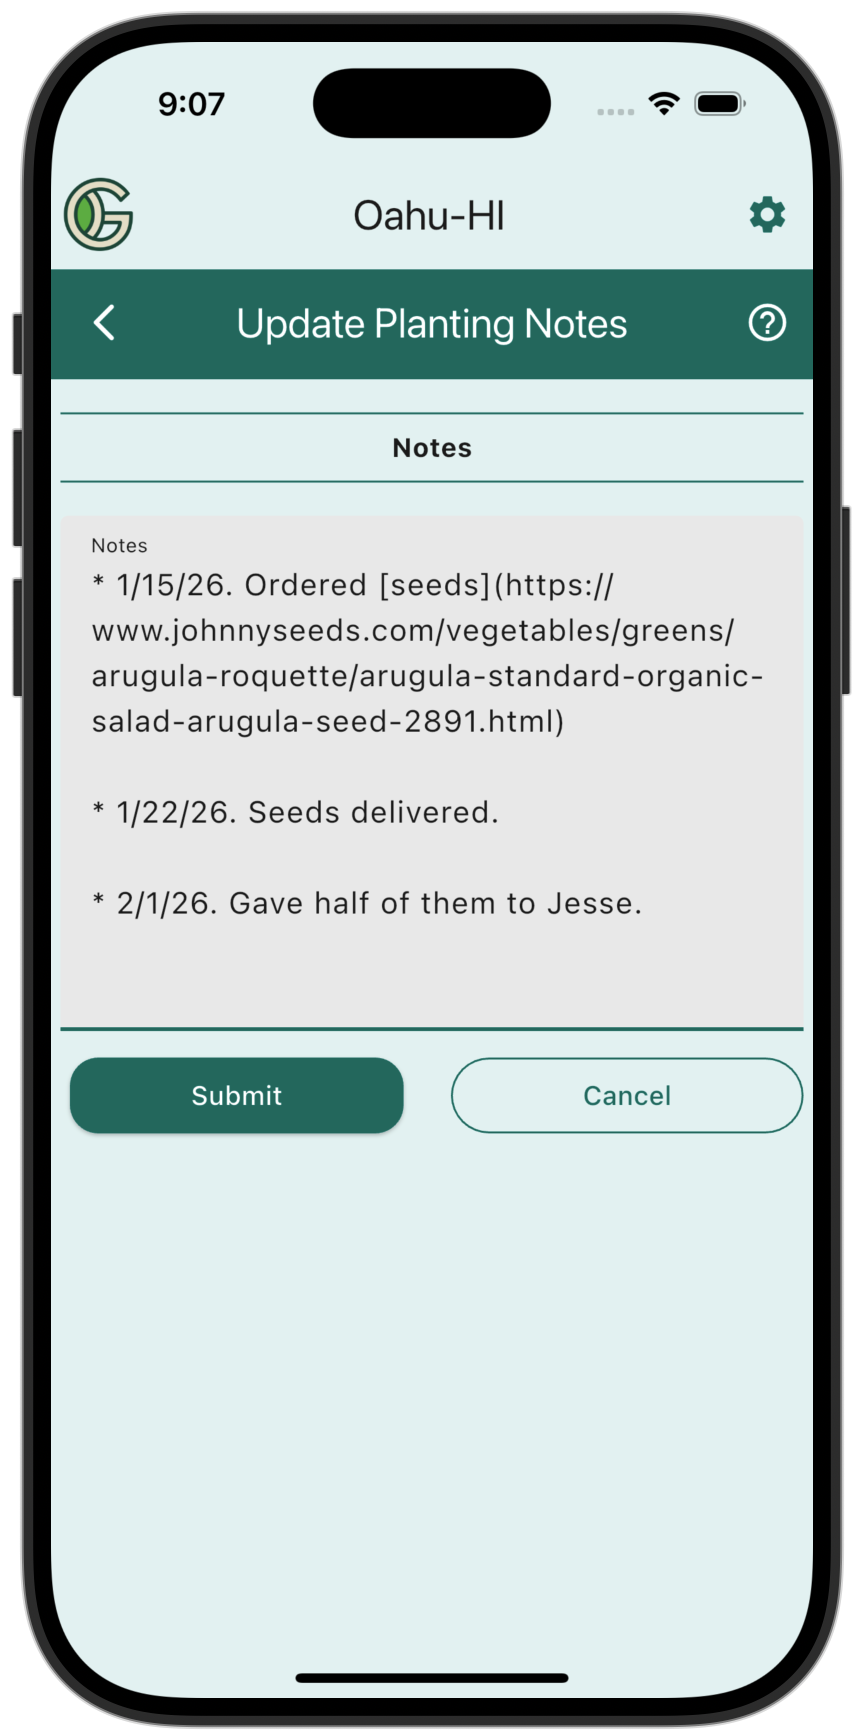
These Notes would be displayed in the Planting Details page like this:
See the Markdown page for more details on this format.
Update Outcomes
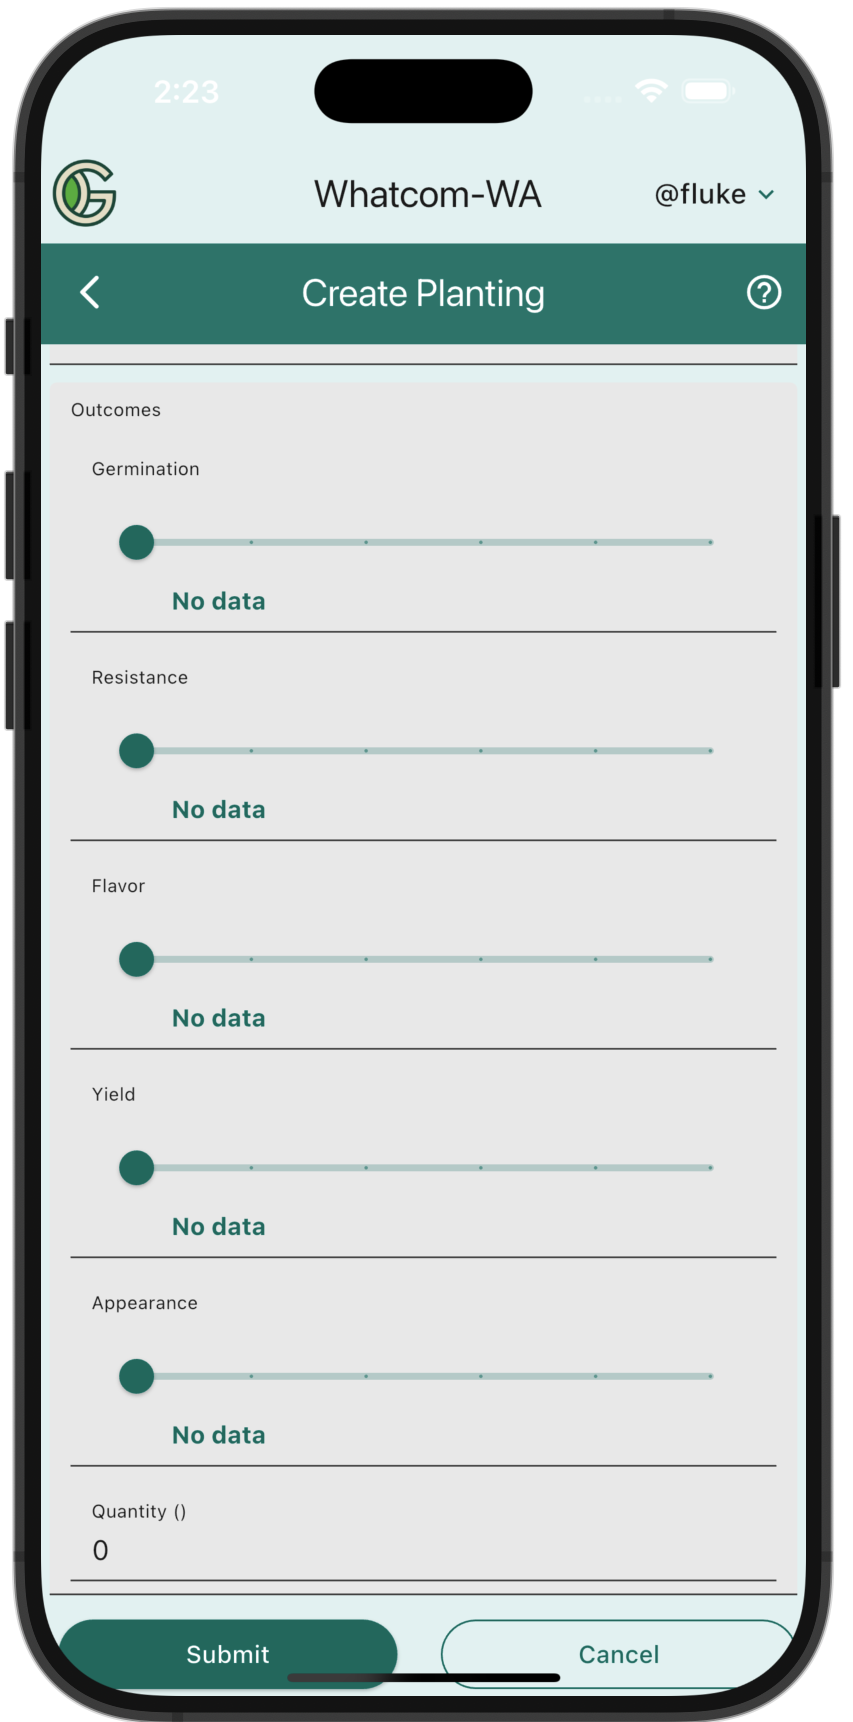
Tap "Update Outcomes" to edit the Outcomes associated with this Planting:
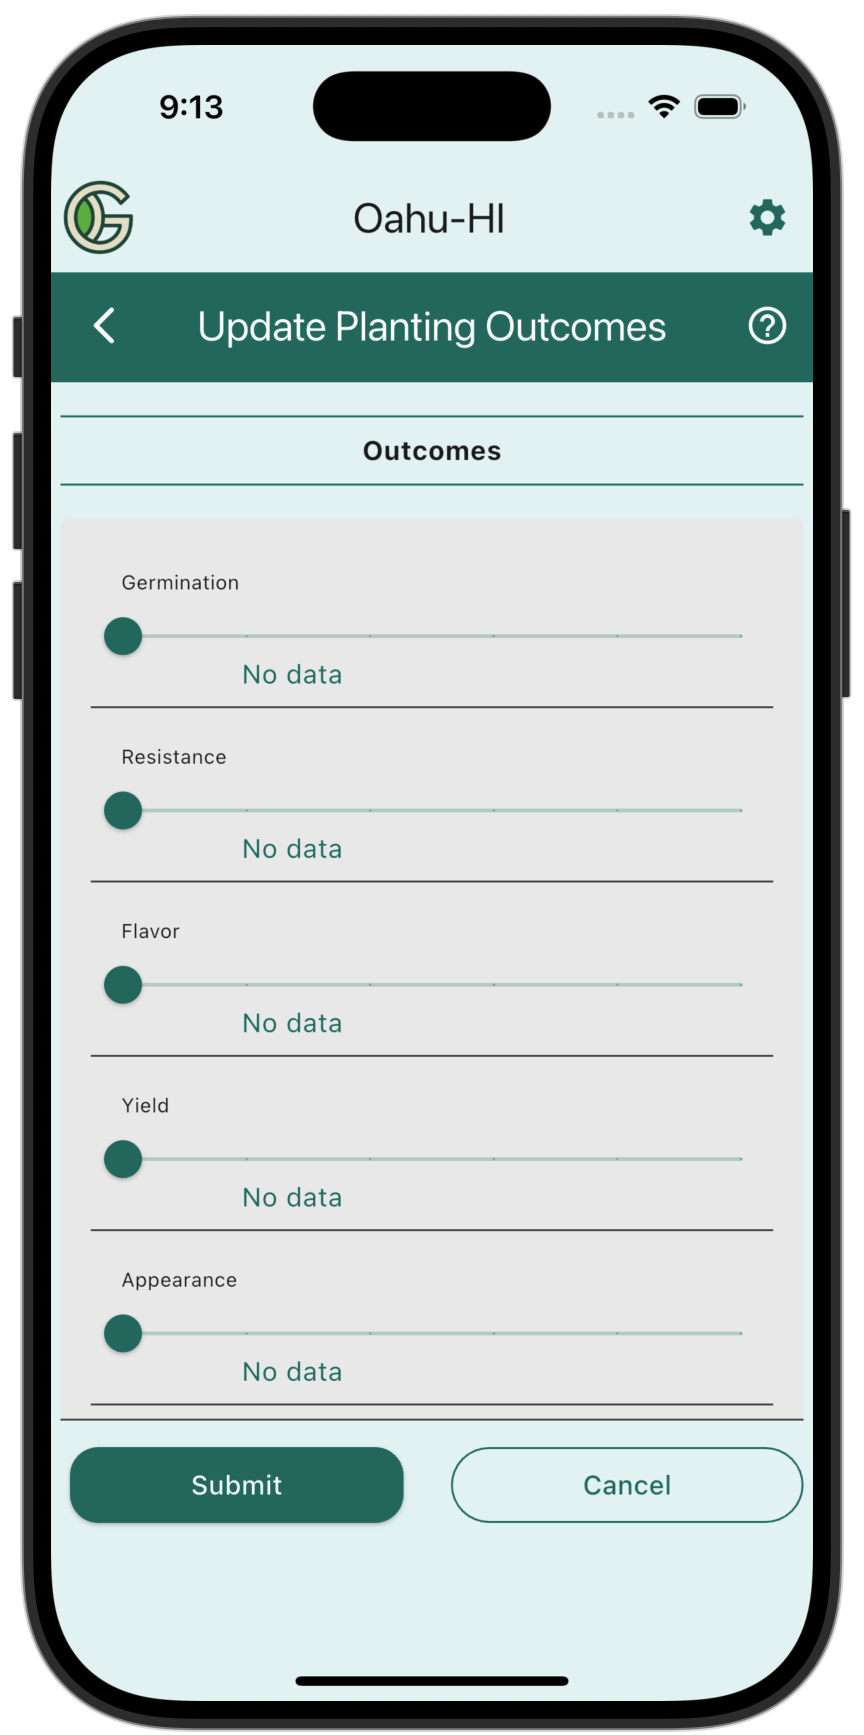
You can update this section as the crop grows. For example:

For more details, see the Outcomes documentation.
Update Quantity
Tap "Update Quantity" to edit the quantity of food you harvested from this Planting:
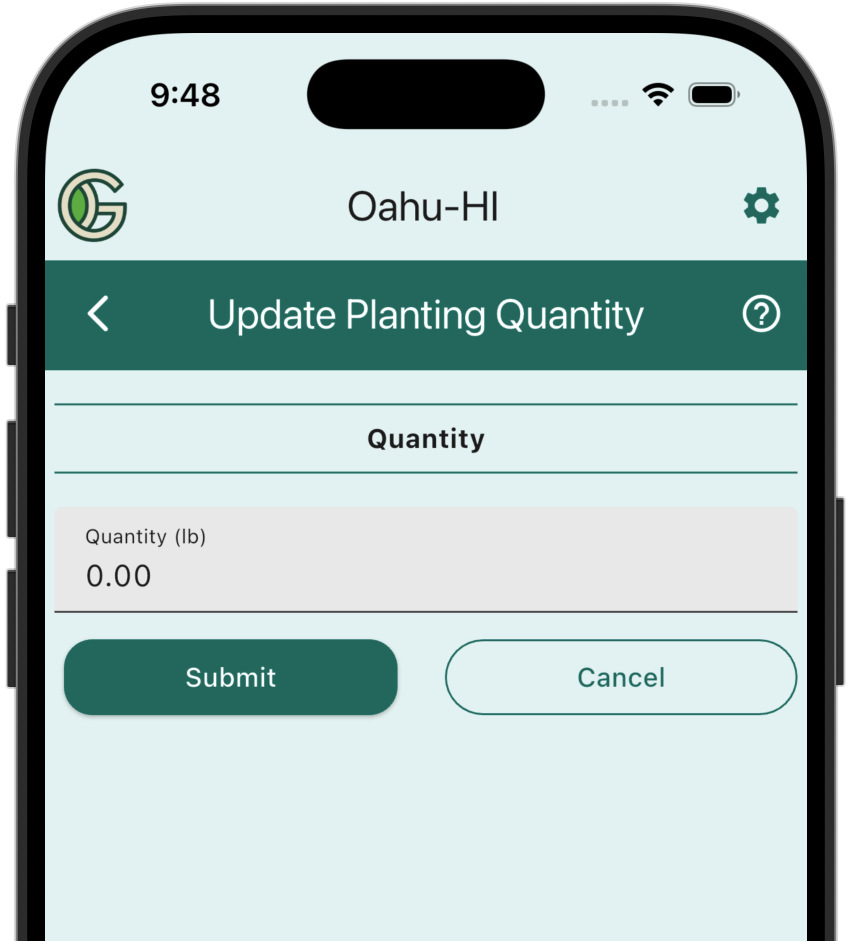
If you are in the US, you will enter the quantity in lbs, and if you are in Canada, you will enter the quantity in kg.
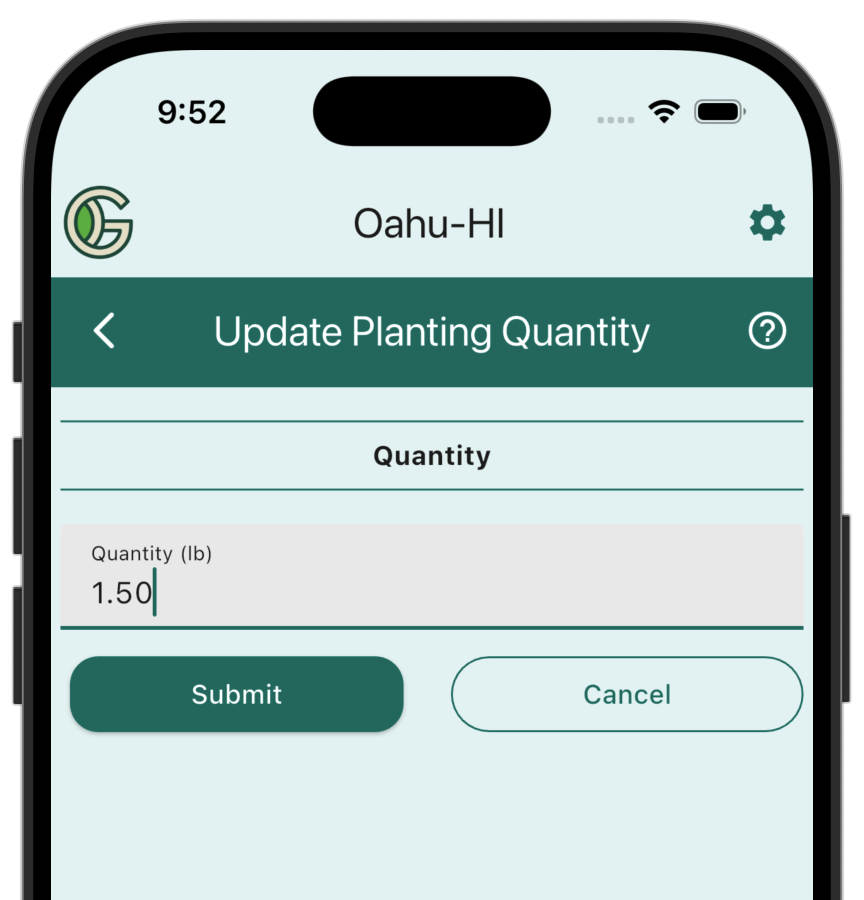
This field only accepts digits, and automatically provides two decimal places. So, if you harvested 1.5 lbs of Arugula, you would type "150" and the system will automatically add the decimal point:
One benefit of recording the quantity of food created by a Planting is that the system will automatically calculate an estimate of the Retail Value of that food. For example, if you added a quantity of 1.5 lbs for Arugula, then that Planting will now have a retail value of $22.50:
For more details. see the Retail Value documentation.
Copy Planting
An important goal of GeoGardenClub is to enable gardeners to easily leverage prior experience---either from your own garden or from someone else's garden. To that end, we have implemented a feature called "Copy Planting".
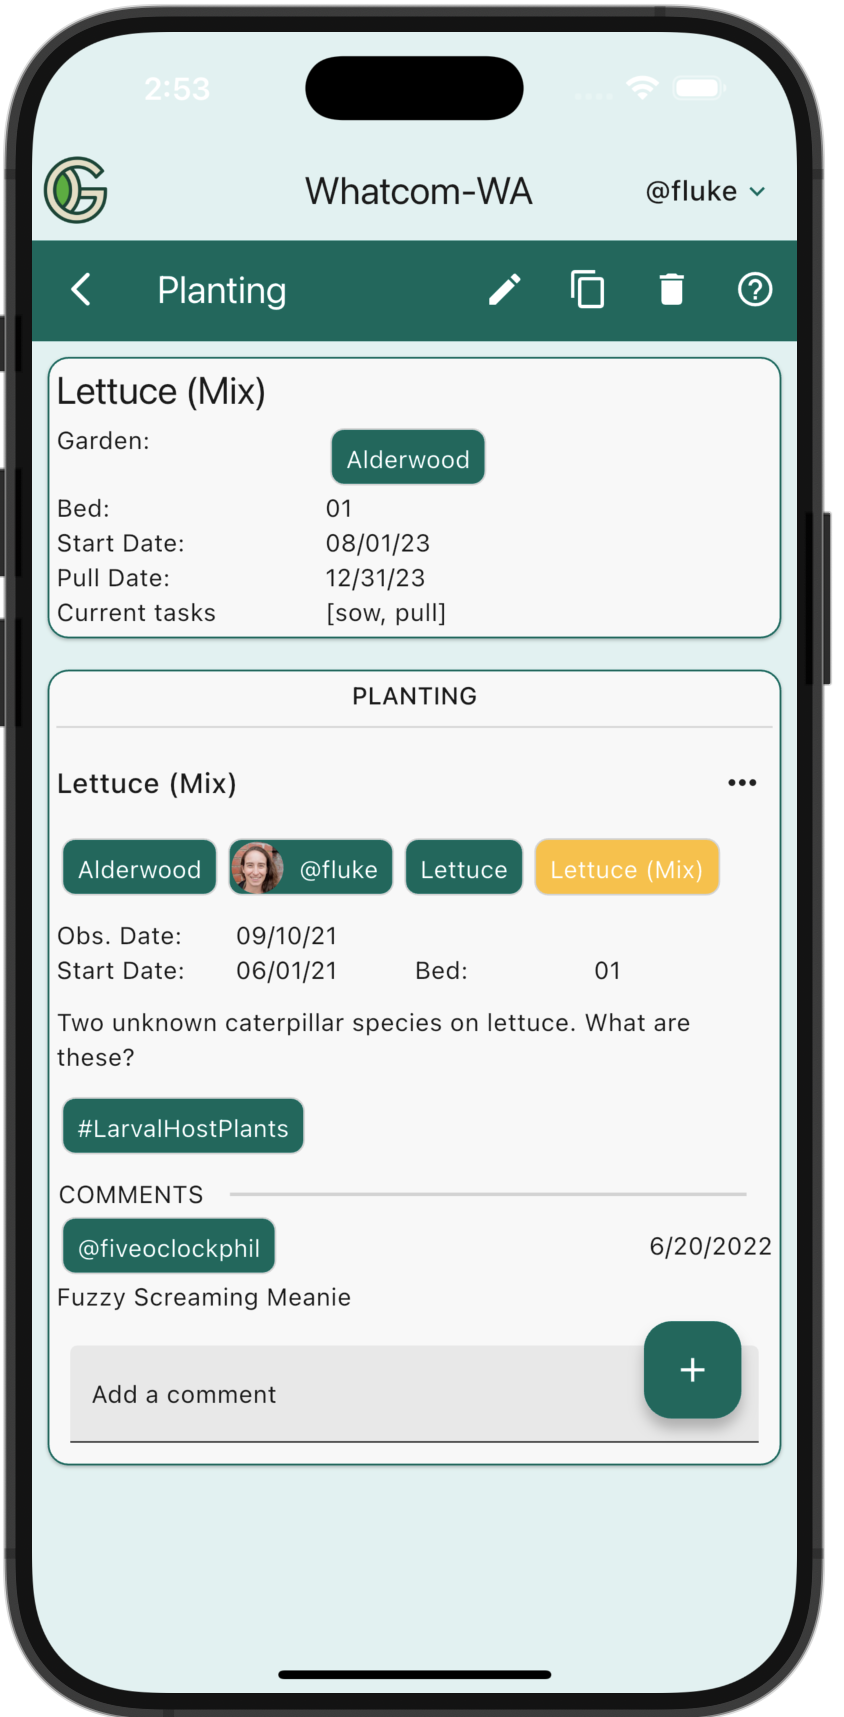
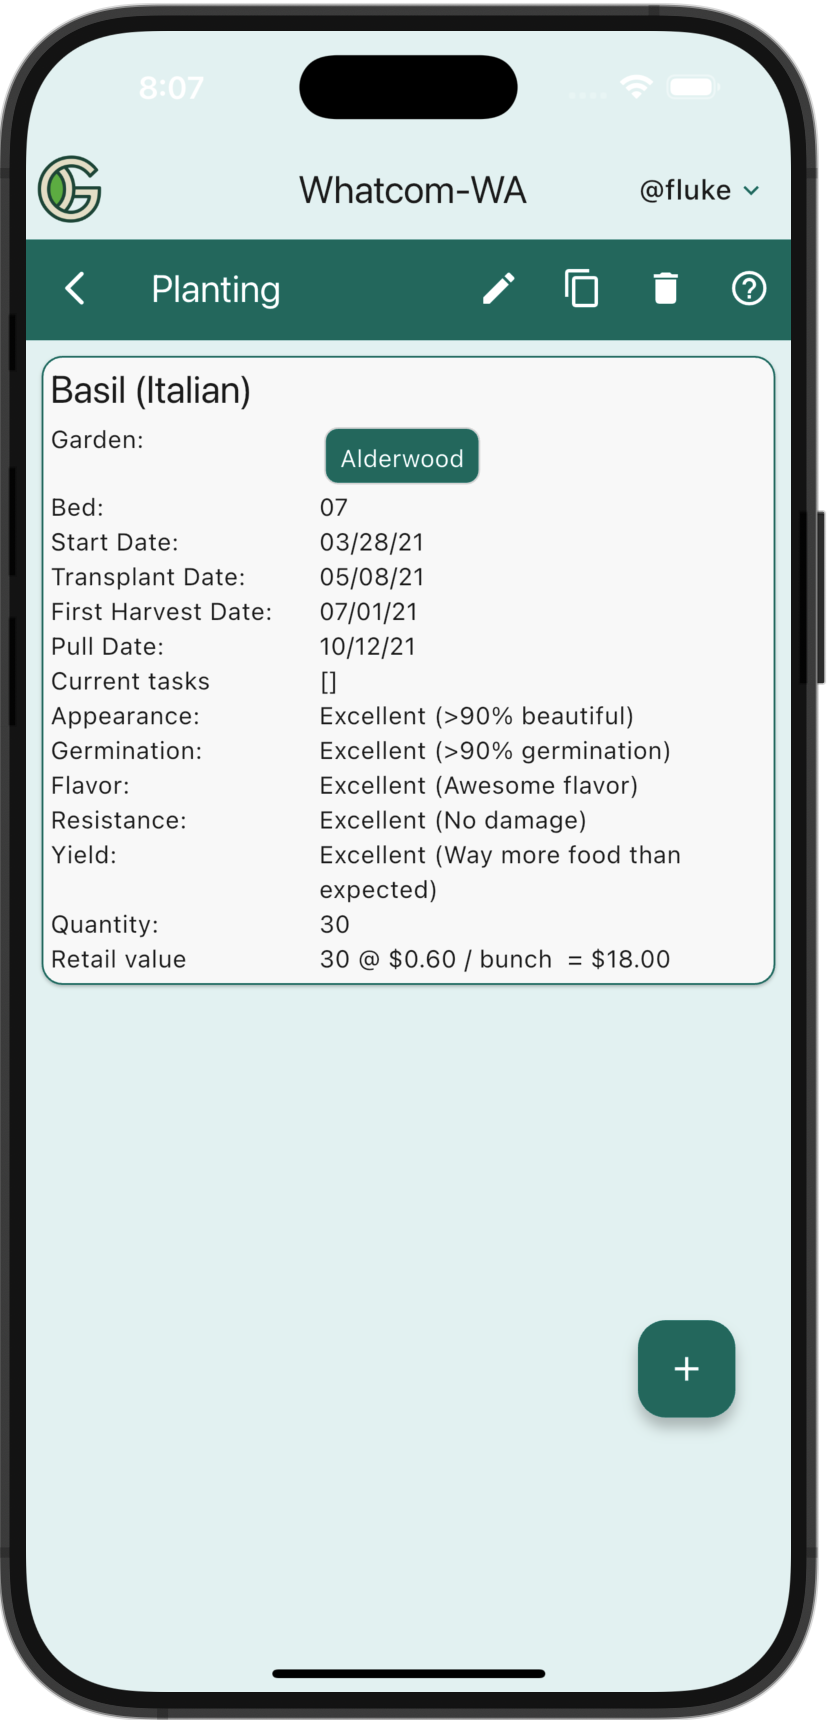
Let's say you (or another) gardener has previously planted Arugula and has recorded excellent outcomes for this Planting:
So, you'd like to repeat this success by using the same Variety and same timing info. In that Planting's Details screen, tap the "Copy" icon (the two overlapping pages image) in the nav bar to bring up the Copy Planting screen:
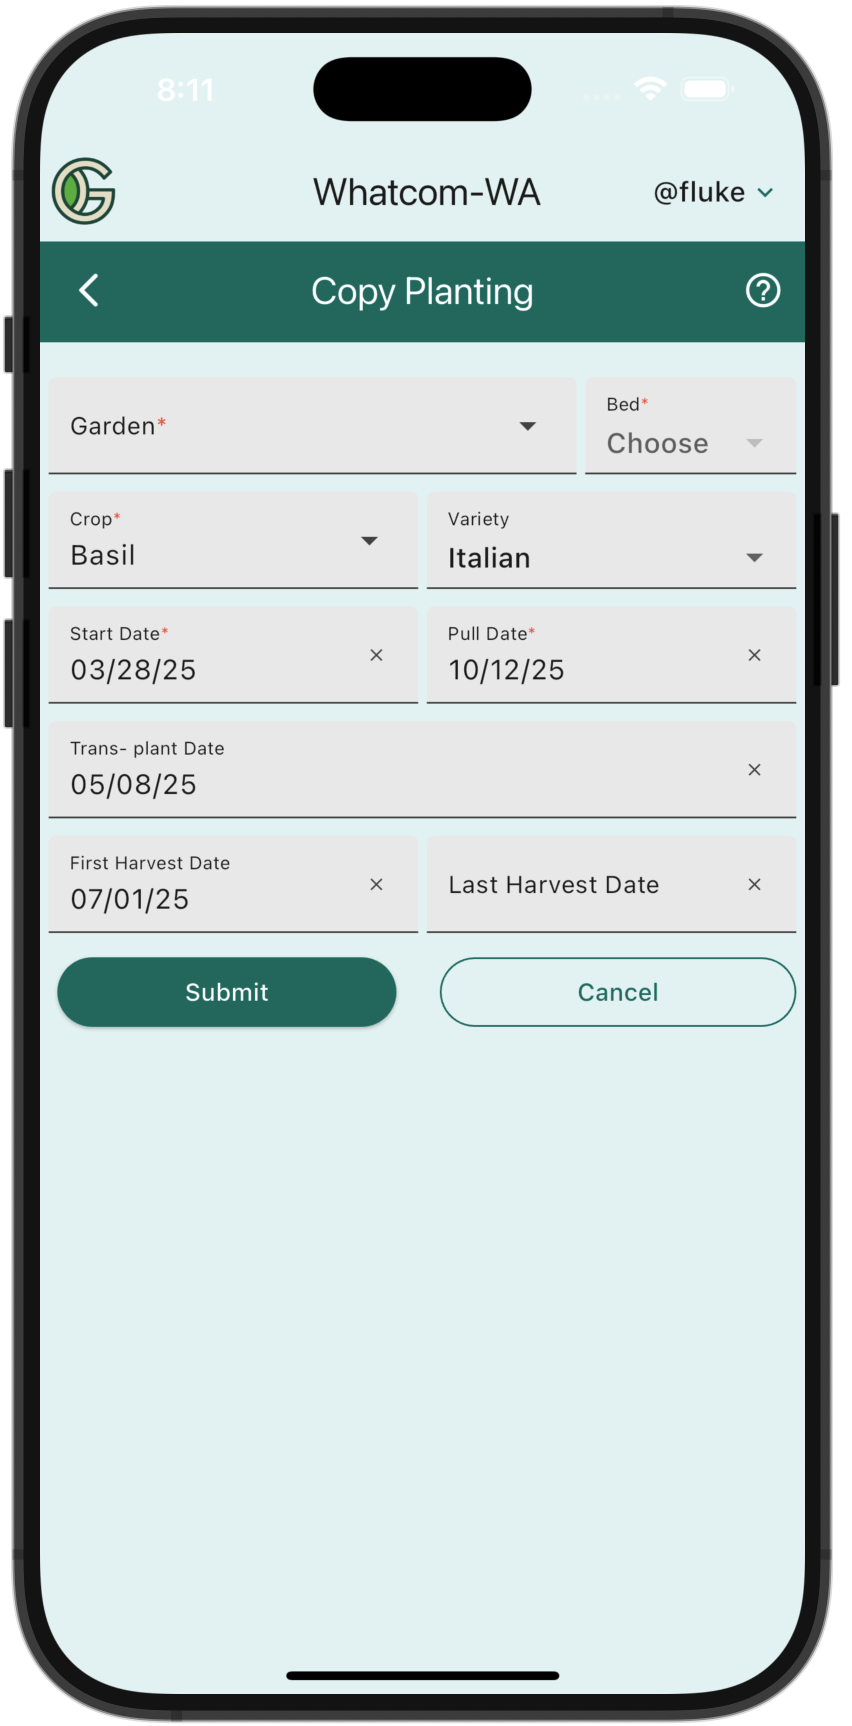
The Copy Planting screen provides a form that is pre-filled with the Crop, Variety, and dates associated with the original Planting. However, the dates are updated to the current year (if necessary).
Select the Garden and Bed you want to create this new Planting in, adjust any other fields, and then tap "Submit" to create it.
Delete a Planting
If you create a Planting by mistake and want to delete it, navigate to its Planting Details page (see above for instructions) and tap the Trash icon in the navbar. That will bring up the Delete Planting screen:
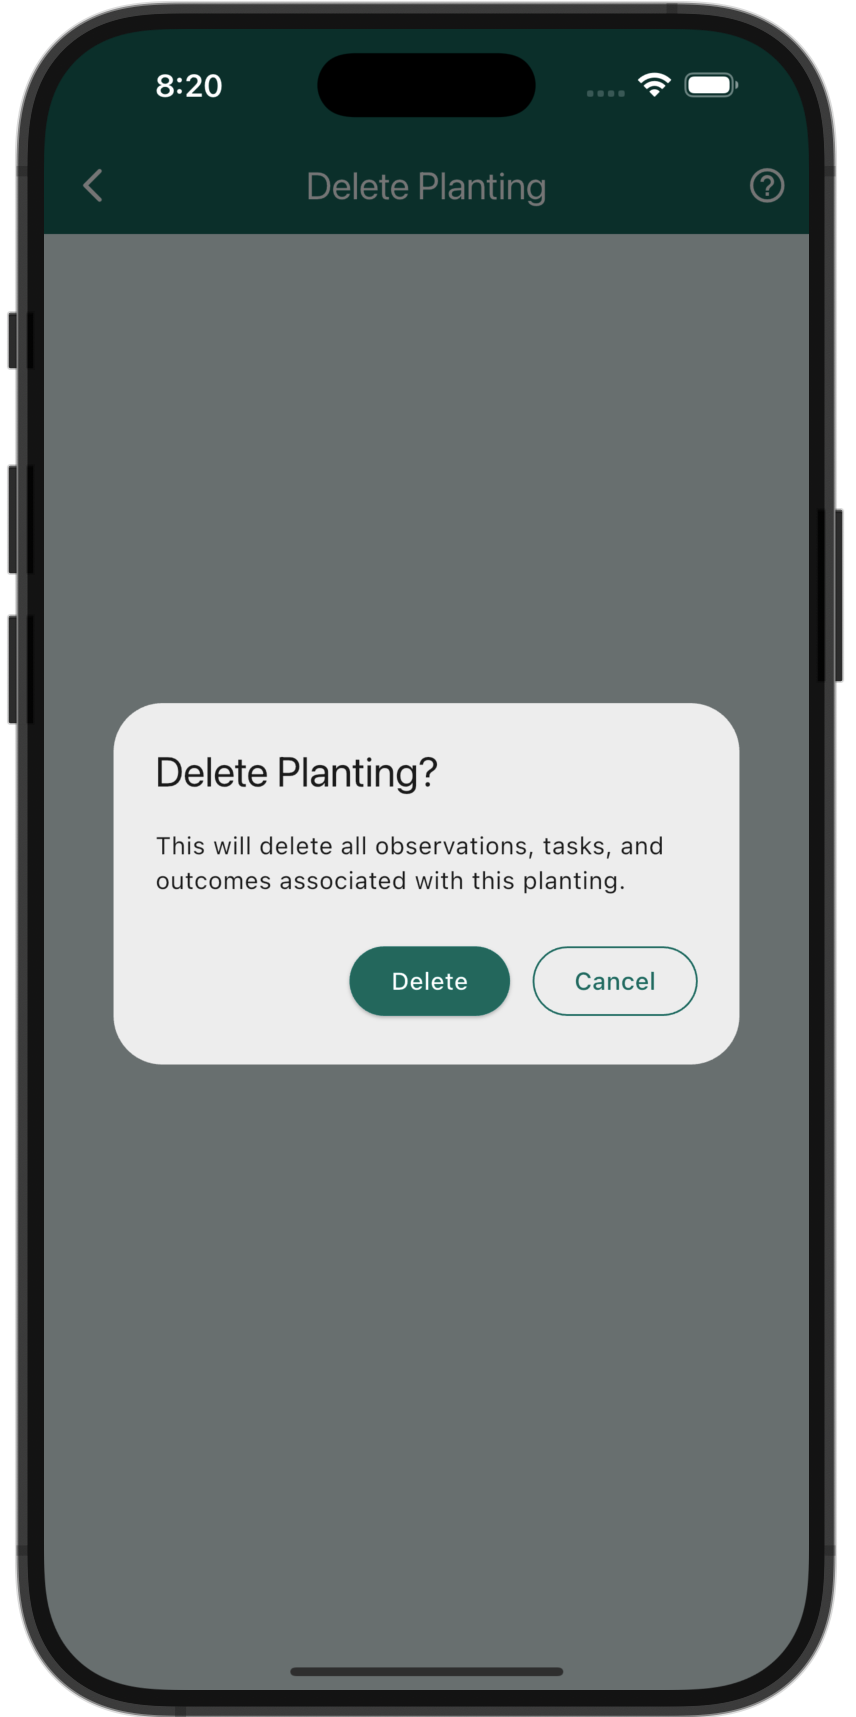
As you can see, deleting a Planting also deletes all Observations, Tasks, and Outcomes associated with that Planting.
Planting date constraints
The dates associated with a Planting must observe the following constraints:
Sow date ≤ Transplant date < First Harvest date < End Harvest date ≤ Pull date
When you define or update a Planting, the associated screens will check to ensure that these constraints are satisfied.
However, when you complete a Task, it is possible to update the date associated with that Task in a way that violates these constraints. For example, you might update the Transplant Date to be accurate, but now it is actually after the First Harvest Date associated with that Planting.
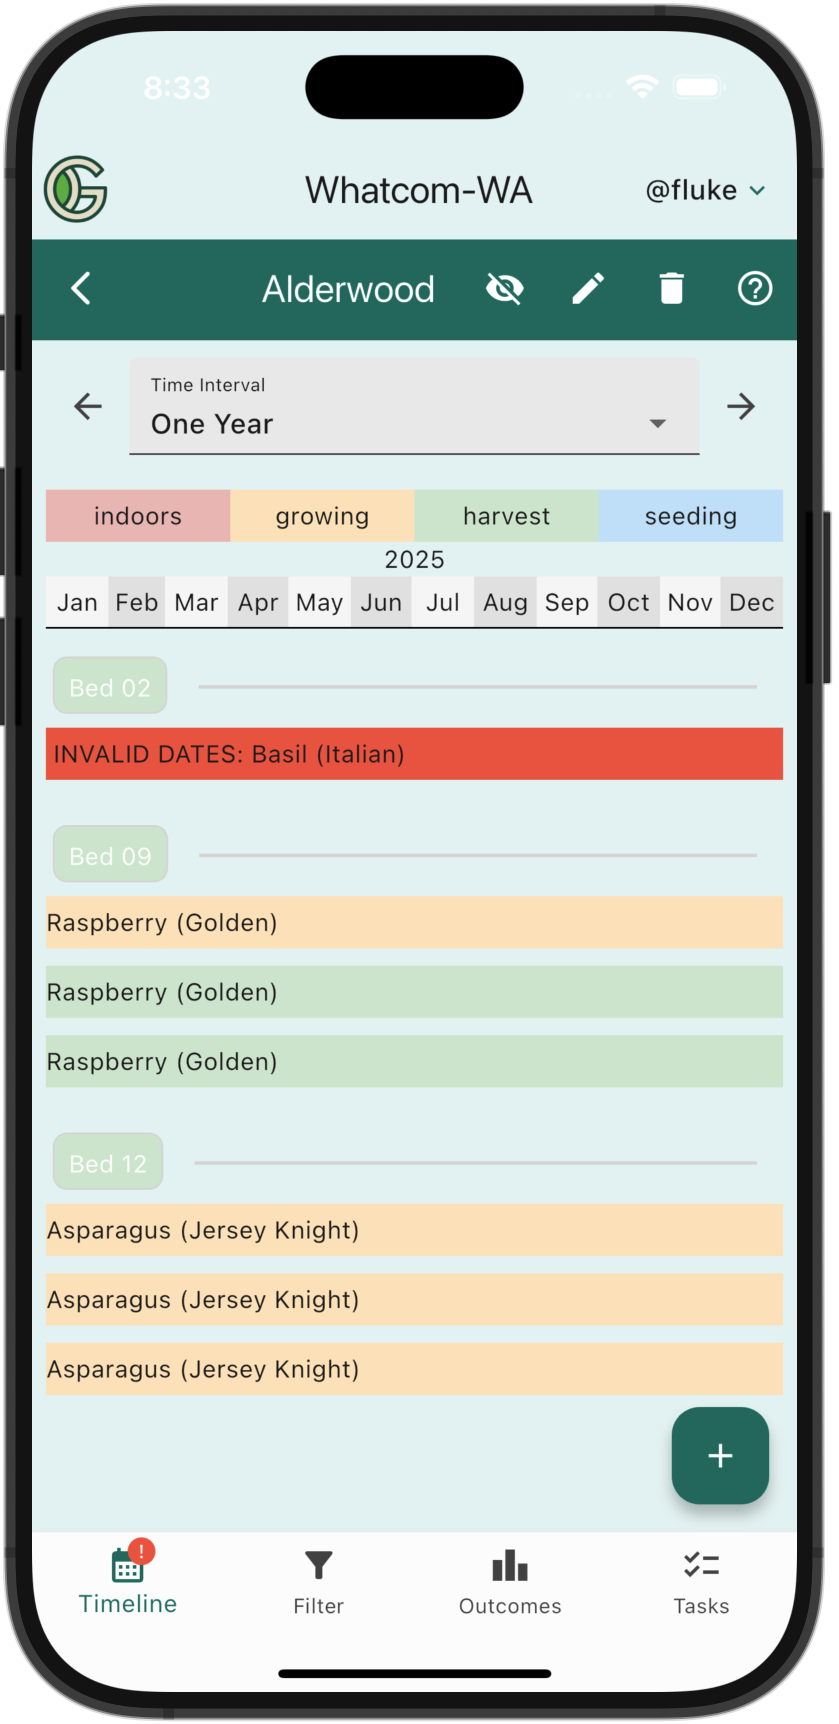
In situations where a Planting's dates no longer conform to the above constraints, the Planting bar will turn red and display an "Invalid dates" error message, and there will be a red exclamation icon in the lower nav bar:
To fix this error, simply tap on the red Planting bar to bring up its Planting Details page, then tap the Pencil icon to bring up the Update Planting screen, and edit the dates to conform to the constraints. The Planting Details screen will provide a help message:
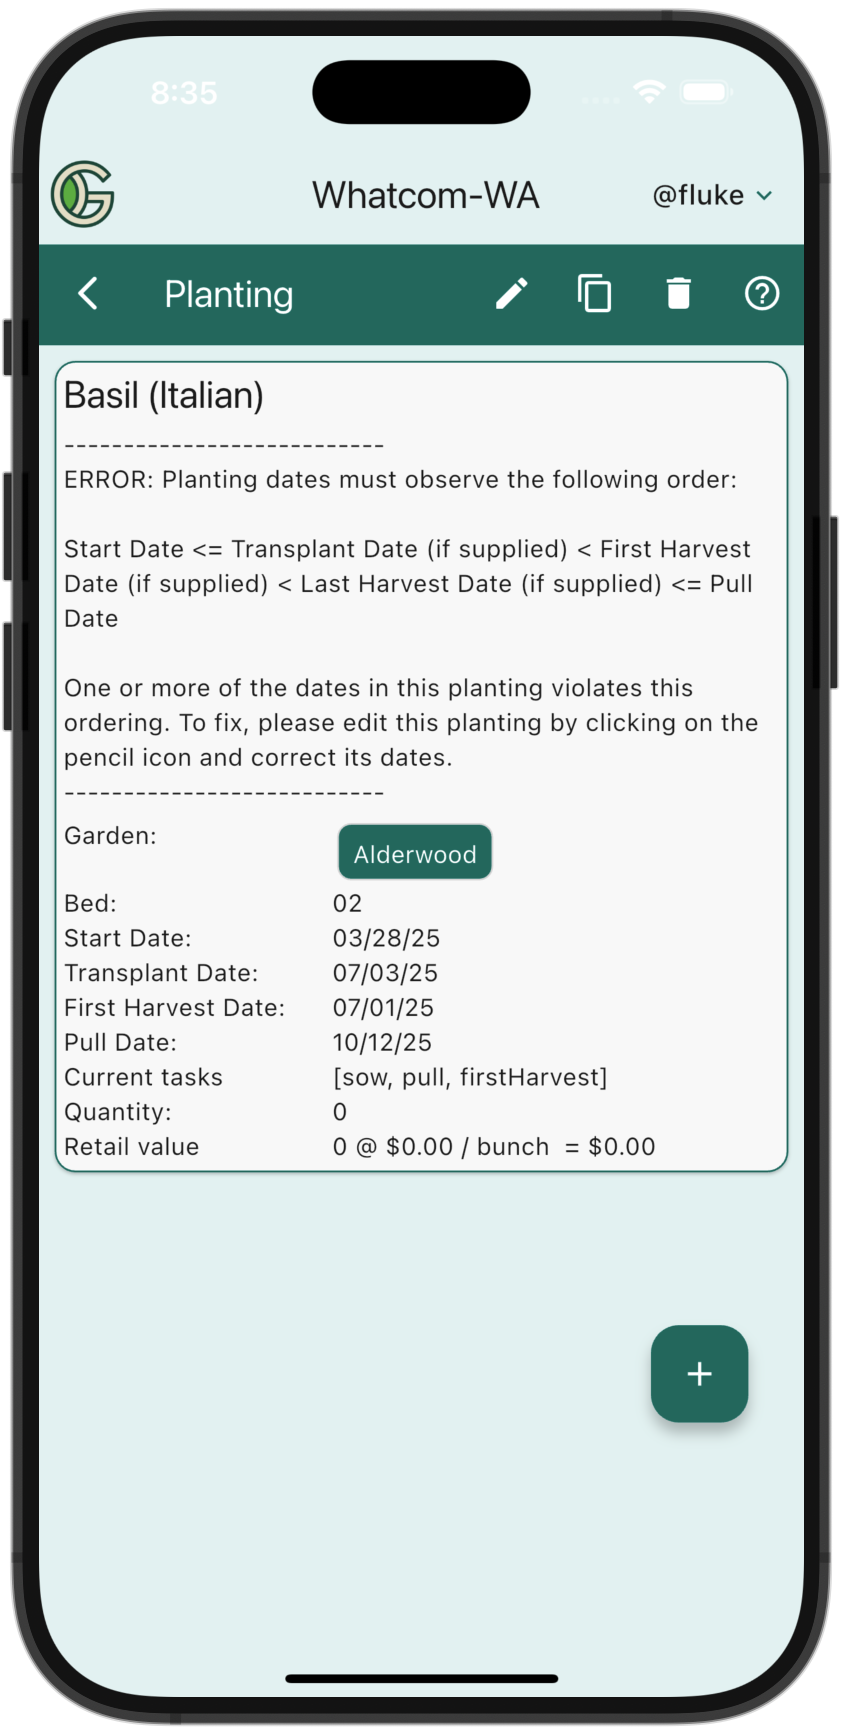
As you can see, the Transplant date occurs after the First Harvest date in this Planting, which is a violation of the date constraints.
Planting Index
Navigate to the Planting Index screen by tapping on "Plantings" in the Drawer. The Planting Index screen provides access to all the Plantings in all the Gardens in the Chapter.
Here is an example Planting Index screen:
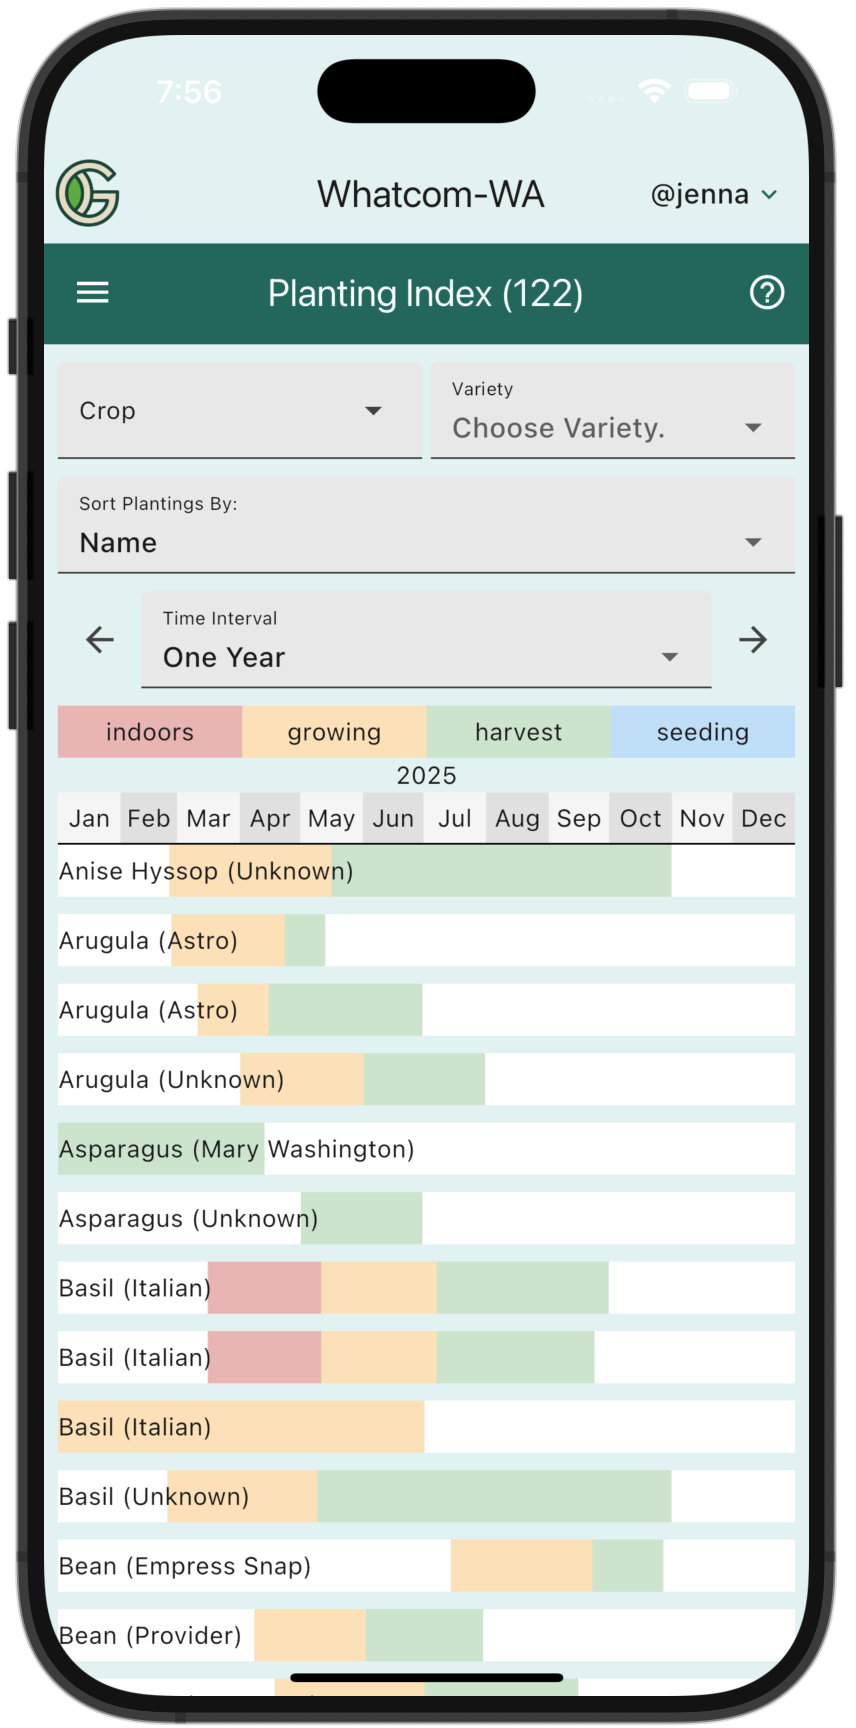
Note that the number of Plantings listed in the NavBar indicates only the number of Plantings in the currently selected time interval, not the total number of Plantings in the Chapter.