Gardens
You can define any number of gardens as a member of GeoGardenClub. Many members will define just one garden. But you could also define more than one, say a "front yard garden" and a "back yard garden", or maybe a "herb garden" and a "produce garden".
Defining a garden enables you to:
- Record what Plantings you grew in each Bed during each season.
- Record the timing of each Planting (such as the start date, transplant date, first harvest date, and pull date).
- Record the outcomes associated with each Planting (such as its appearance, yield, quantity, resilience, and germination success).
- Record observations, possibly including a picture, to help you remember important events as they occur.
You don't have to do all of these things, of course! But by tracking at least some of this information over time, you can gather data that enables you to improve your garden's productivity each season. Plus, as a member of GeoGardenClub, you can see the data collected by other members to accelerate your learning even more.
For example, you can find out which variety of Beans grows best in your area, or find out when others are transplanting tomatoes, or learn about a pest that has appeared in someone's garden in your Chapter and take preventative measures.
The first time you sign in to GeoGardenClub, after completing the registration, profile creation, and subscription acceptance screens, the "Gardens" tab of your Home Screen will look like this:
For first time users, the screen will indicate that you have not defined any gardens. Keep reading to learn how to fix that!
Create a garden
Tap on the "+ Garden" button in the lower left corner. This will bring up the Create Garden Screen:
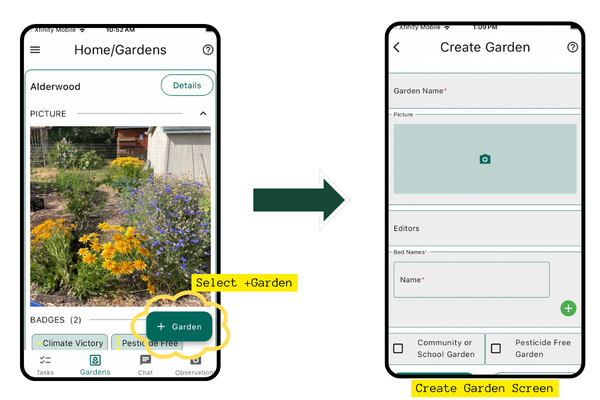
Fill out the form as follows:
Name: Give your garden a name. This name is public to others, and must be unique.
Picture: (optional) Add a picture to be associated with your garden. This could be a garden map or photo.
Plot Plan: (optional) Add a picture of your garden plot plan. This is especially helpful to help you remember which bed is which.
Editors: (optional) Specify people who help complete tasks in your garden as a comma-separated list of usernames. By adding their username, they will be able to create, update, and delete beds, plantings, tasks, outcomes, and so forth. You can add or subtract editors at any time in the Update Garden Screen.
Initial Bed Name: (Optional) All Gardens must have at least one Bed. Beds can represent literal garden beds, pots/containers, a greenhouse, or other locations where you grow food. The default name for the initial bed is "01". If you want to change the Bed name, edit this field.
Bed names must be:
- 1-20 characters long
- Made of letters, numbers, and spaces. No special characters.
- You don't need to include the word "bed", we'll do that for you!
Additional beds can be added in the Timeline Screen (more instructions below)
Community or school garden? Check this box if this is a community or school garden. There are special badges for gardeners that participate in these group efforts!
Pesticide free garden? Check this box if you are committed to not using pesticides in your garden. There are special badges for gardeners who choose to be pesticide free.
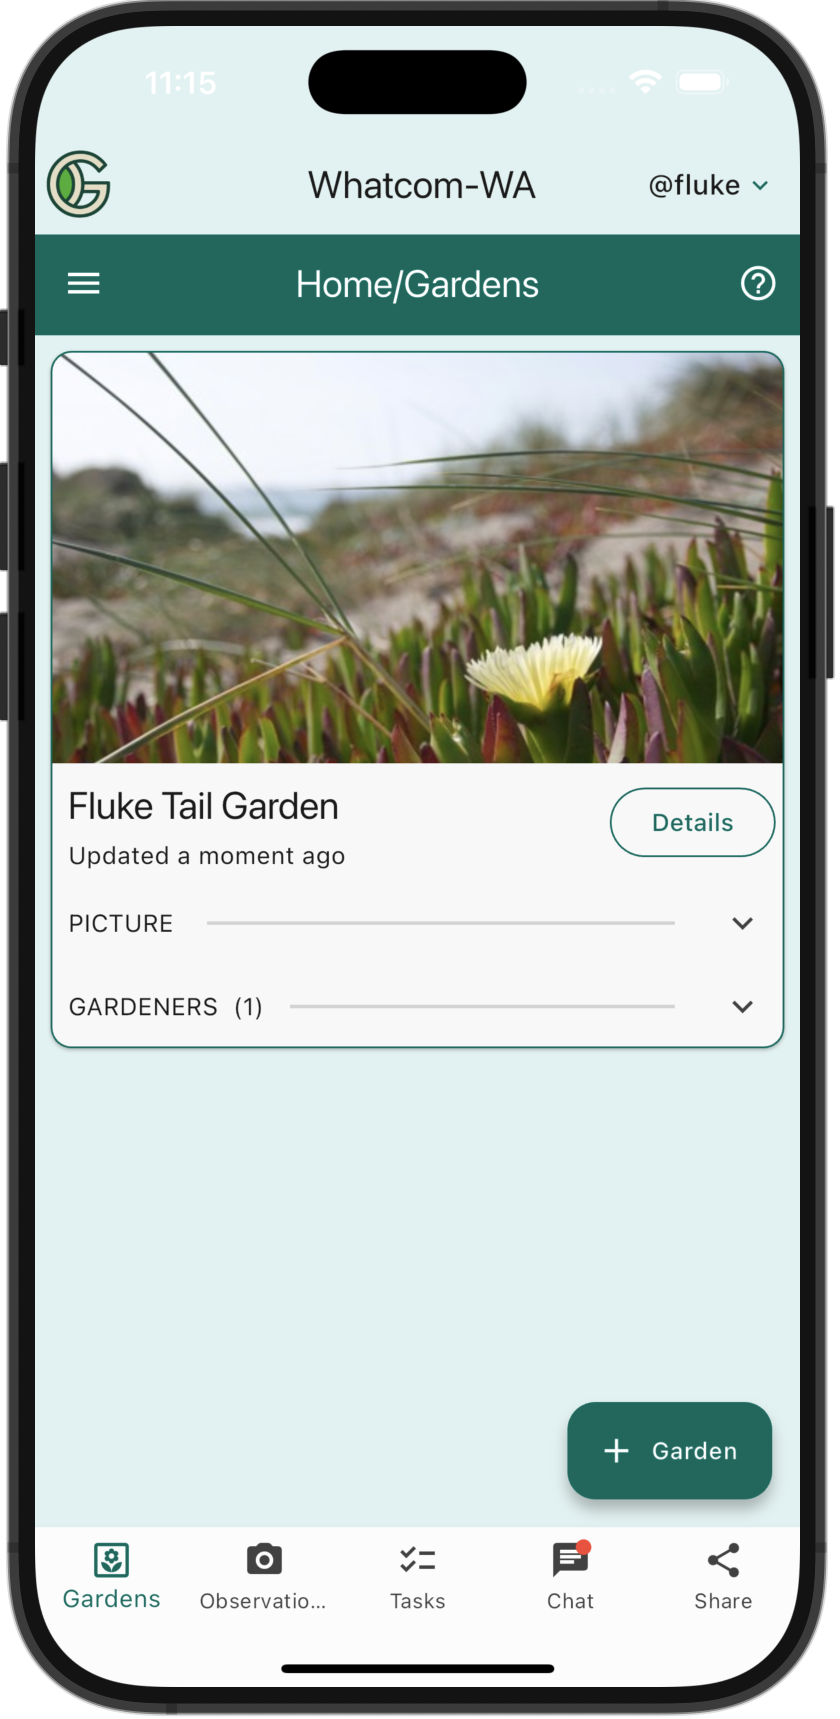
Tap Submit to define the garden. You'll be returned to the Gardens view of your Home Screen, which might now look like this:
Update a garden
To update the basic information about a garden, first tap on the "Details" button associated with the garden in the Gardens view of your Home Screen. This will take you to the Timeline section of the Garden Details view, which will look something like this:
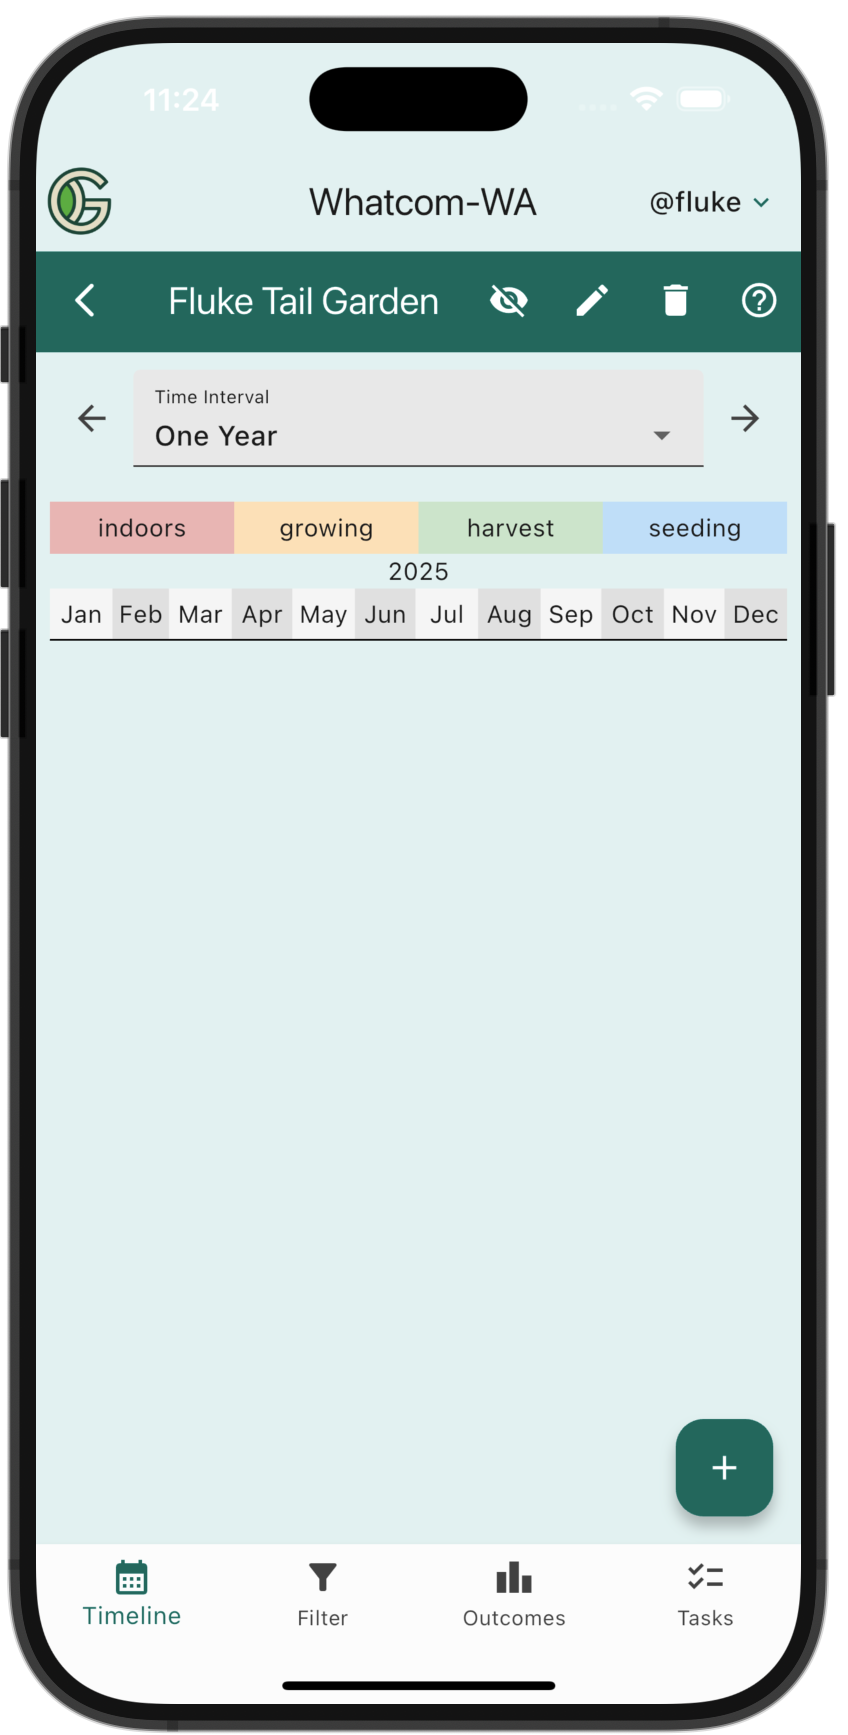
Now tap the pencil icon in the navbar to bring up the Update Garden screen:
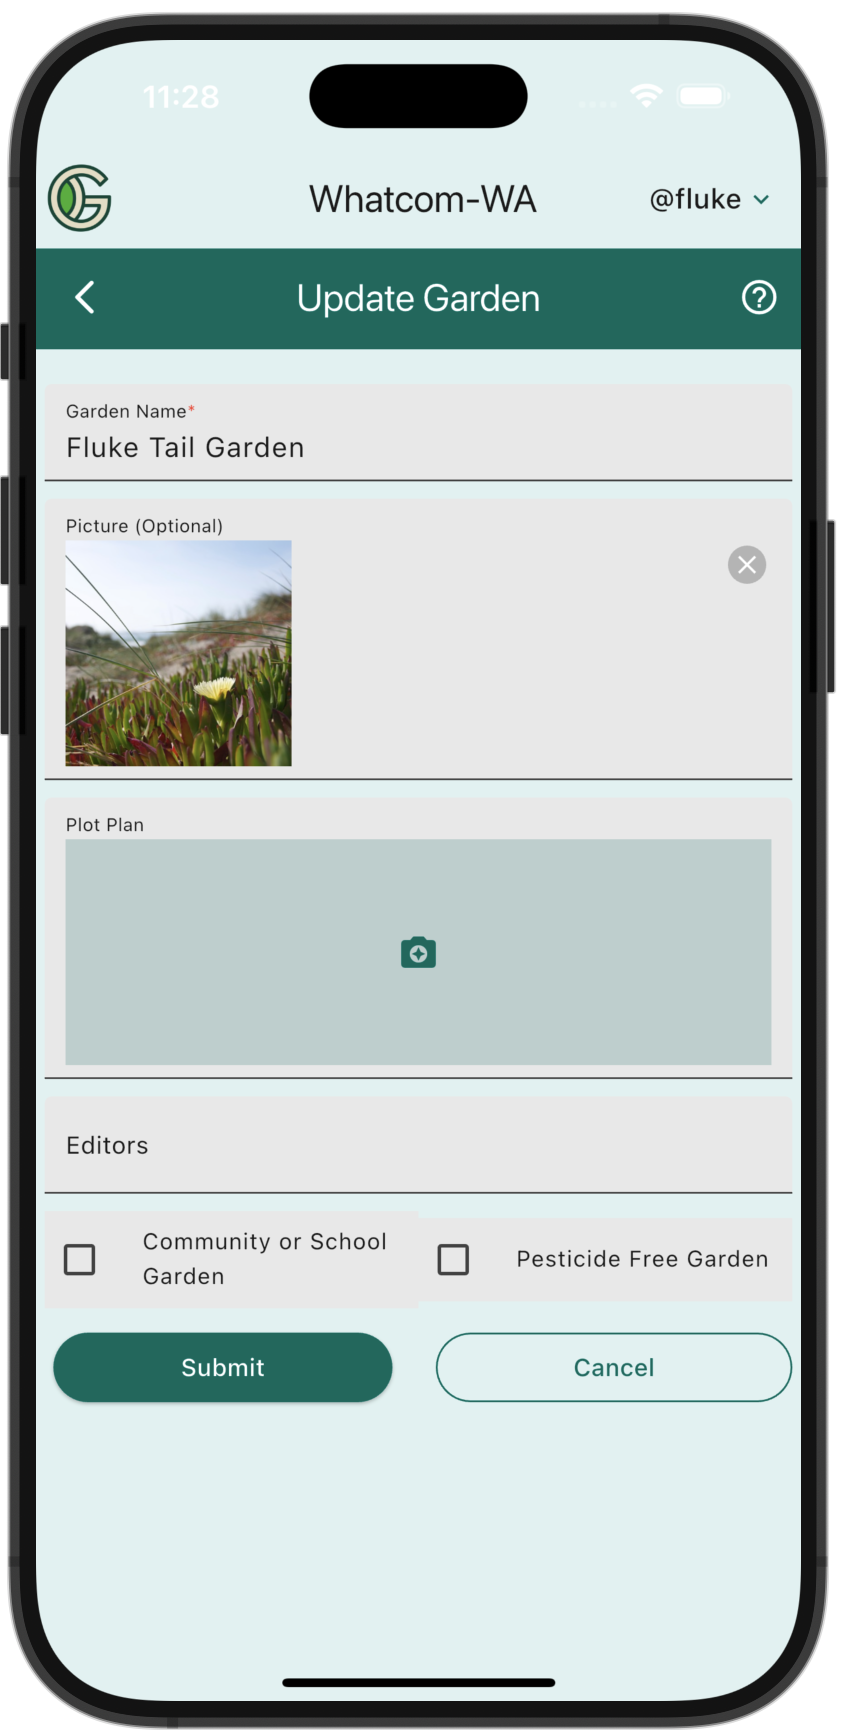
Fill out the form as follows:
Name: Update your garden name. This name is public to others, and must be unique.
Picture: (optional) Add, delete, or change the picture to be associated with your garden. This could be a garden map or photo.
Plot Plan: (optional) Add, delete, or change a picture of your garden plot plan. This is especially helpful to help you remember which bed is which.
Editors: (optional) Add or delete people who help complete tasks in your garden as a comma-separated list of usernames. By adding their username, they will be able to create, update, and delete beds, plantings, tasks, outcomes, and so forth.
Community or school garden? Check this box if this is a community or school garden. There are special badges for gardeners that participate in these group efforts!
Pesticide free garden? Check this box if you are committed to not using pesticides in your garden. There are special badges for gardeners who choose to be pesticide free.
Tap "Submit" to save your changes, or "Cancel" if you want to keep the original data.
Delete a garden
Sometimes you will create a garden by mistake, or want to delete it for some other reason. To do so, first tap the "Details" button associated with the garden in the Gardens view of your Home Screen. This will take you to the Timeline section of the Garden Details view, which will look something like this:
Now tap the trash can icon in the navbar to bring up the Delete Garden screen:
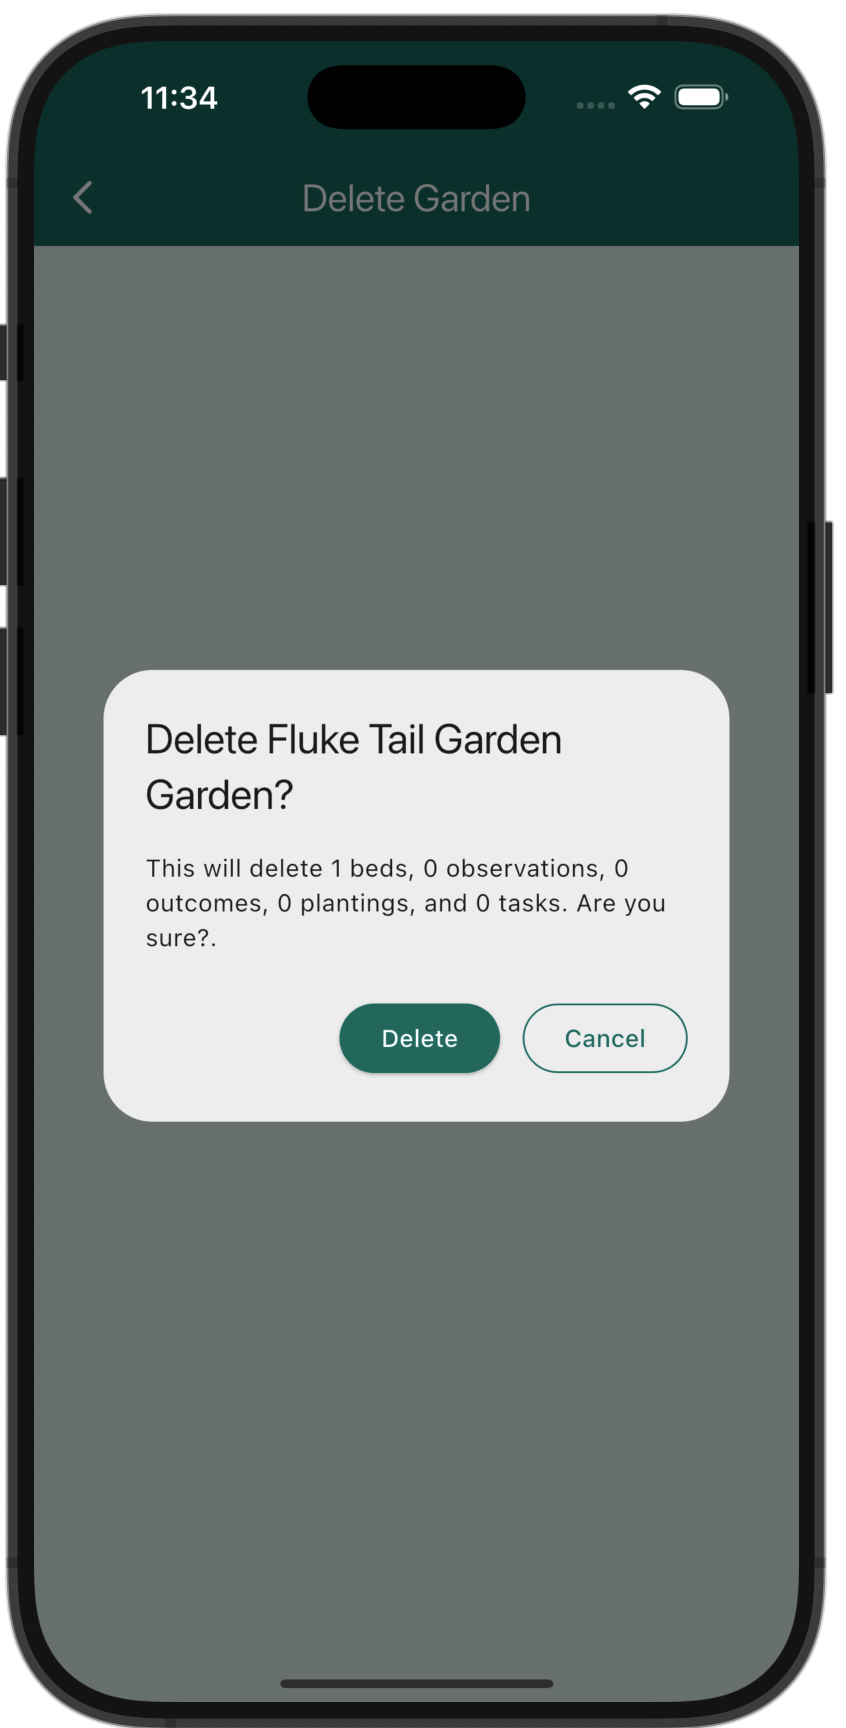
Tap "Delete" to delete the garden, or "Cancel" if you change your mind.
Garden Details
The Garden Details screen is where most of the heavy lifting for garden management occurs. To get to the Garden Details screen for a garden, first go to the Gardens view of your Home screen, which in the case of an active GGC member might look like this:
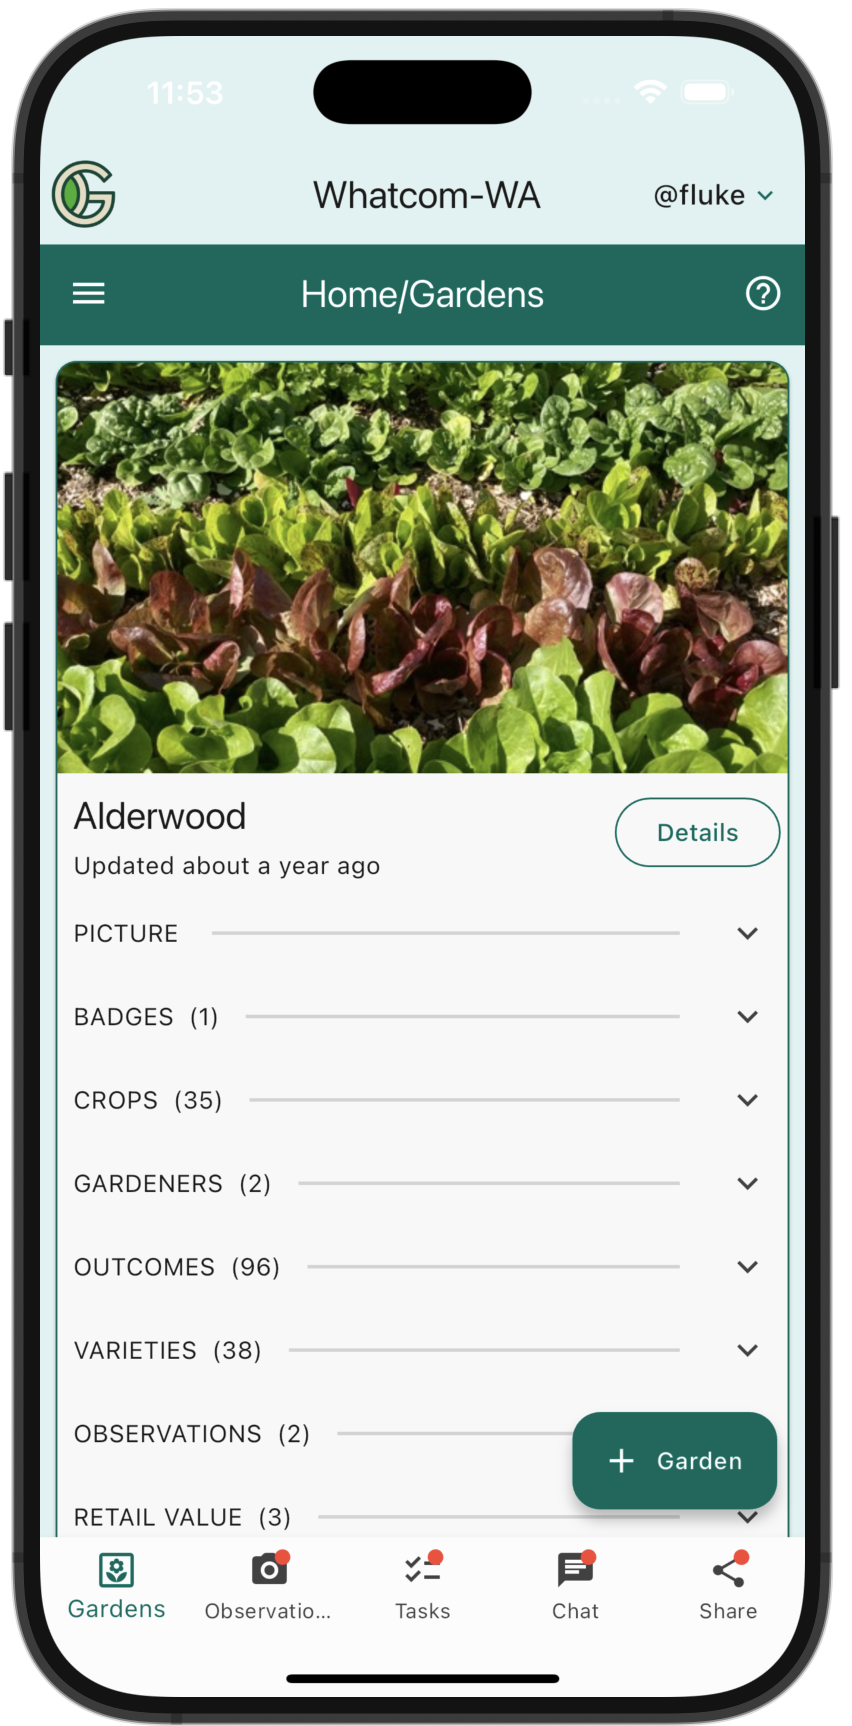
Tap the "Details" button to go the Timeline View of the Garden Details screen.
Timeline view
The Timeline view of the Garden Details screen looks something like this:
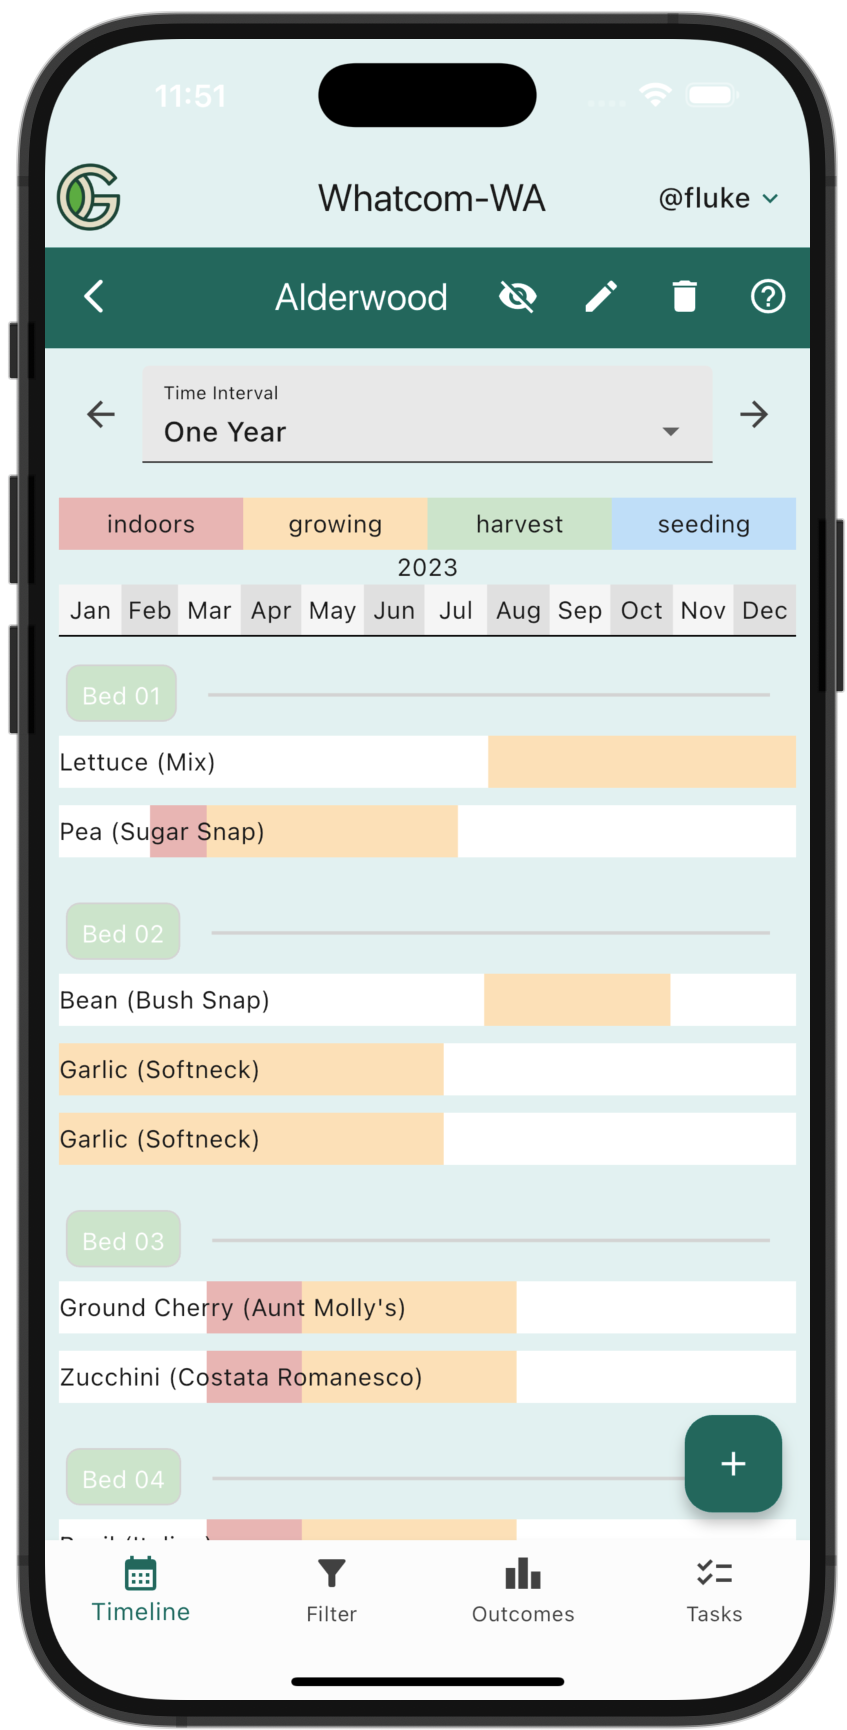
The Timeline view provides several features:
Time Interval: Use the Time Interval dropdown to adjust the interval of time shown in the screen, from one month to one year. Use the forward and back arrows to slide back and forth in time.
Planting details: Tap on a Planting to go to its Planting Details Screen. For more details, see the Planting documentation.
Update bed: Tap on a Bed chip to go to its Update Bed screen. For more details, see the Bed documentation.
Add Bed, Add Planting: Tap on the "+" button to display buttons to enable you to add a new Bed or a new Planting. For more details, see the Bed documentation or Planting documentation.
Filter view
Tap on the "Filter" icon in the bottom navigation bar of the Garden Details screen to display the Filter view.
The Filter view allows you to see how aspects of your Garden have changed over time. For example, the following screen shows what plantings have been in Bed 01 over the three years. This type of information is helpful for implementing crop rotation strategies, for example.
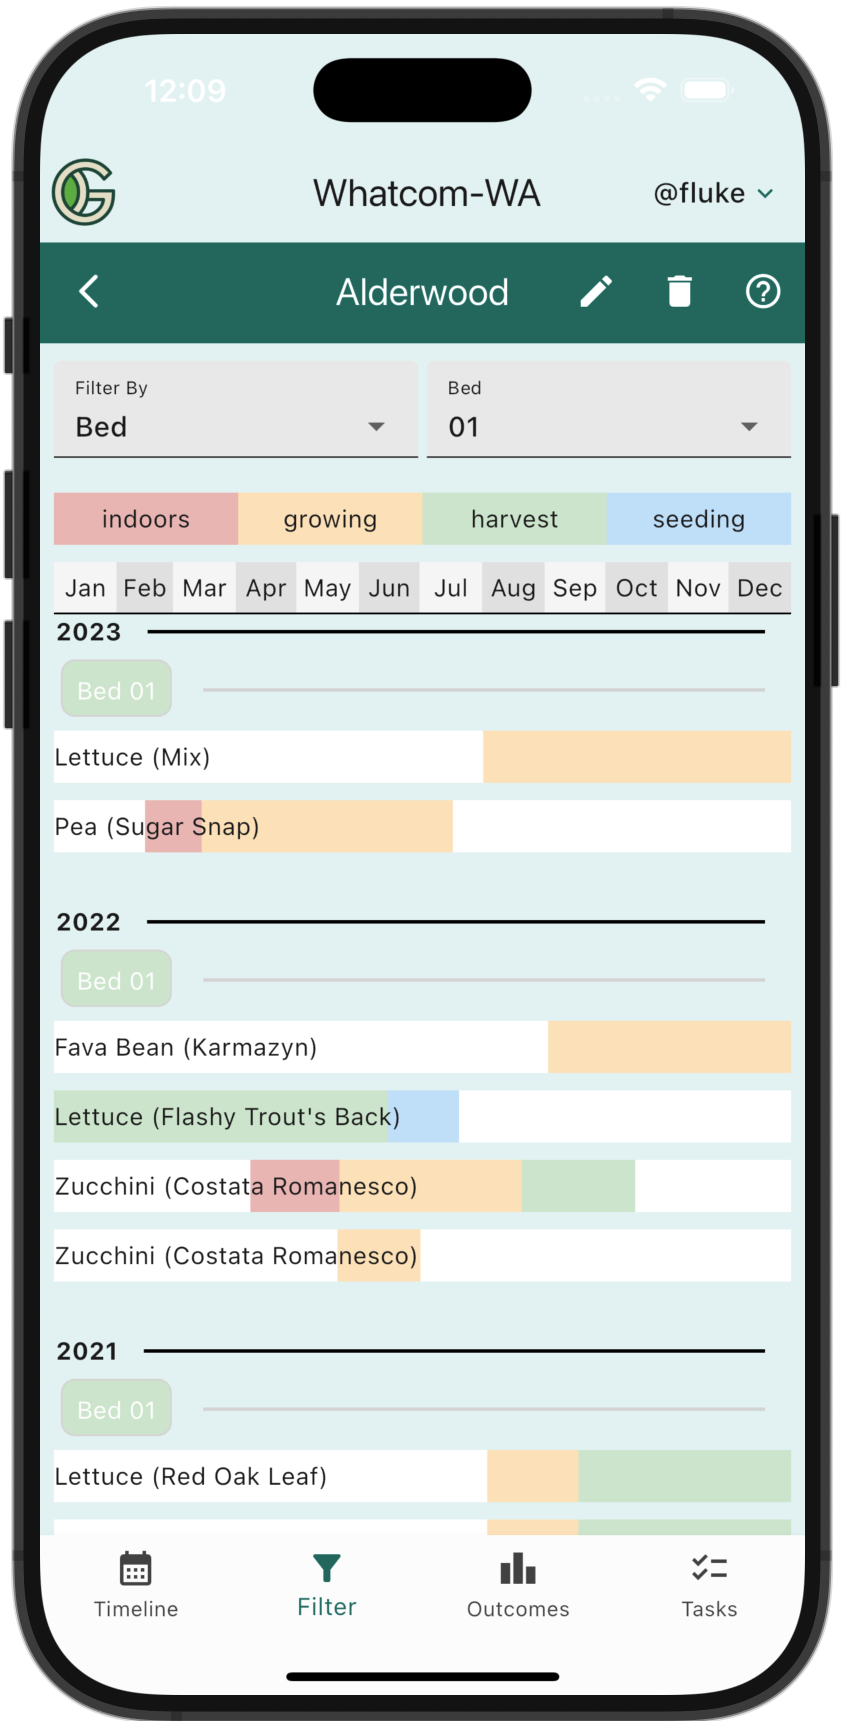
Filter by: Use the "Filter By" dropdown to select whether you want to filter by Bed, Crop, Family, or Variety.
Outcomes view
Tap on the "Outcomes" icon in the bottom navigation bar of the Garden Details screen to display the Outcomes view.
The Outcomes view allows you to explore the Outcome data you have recorded for this garden. For example:
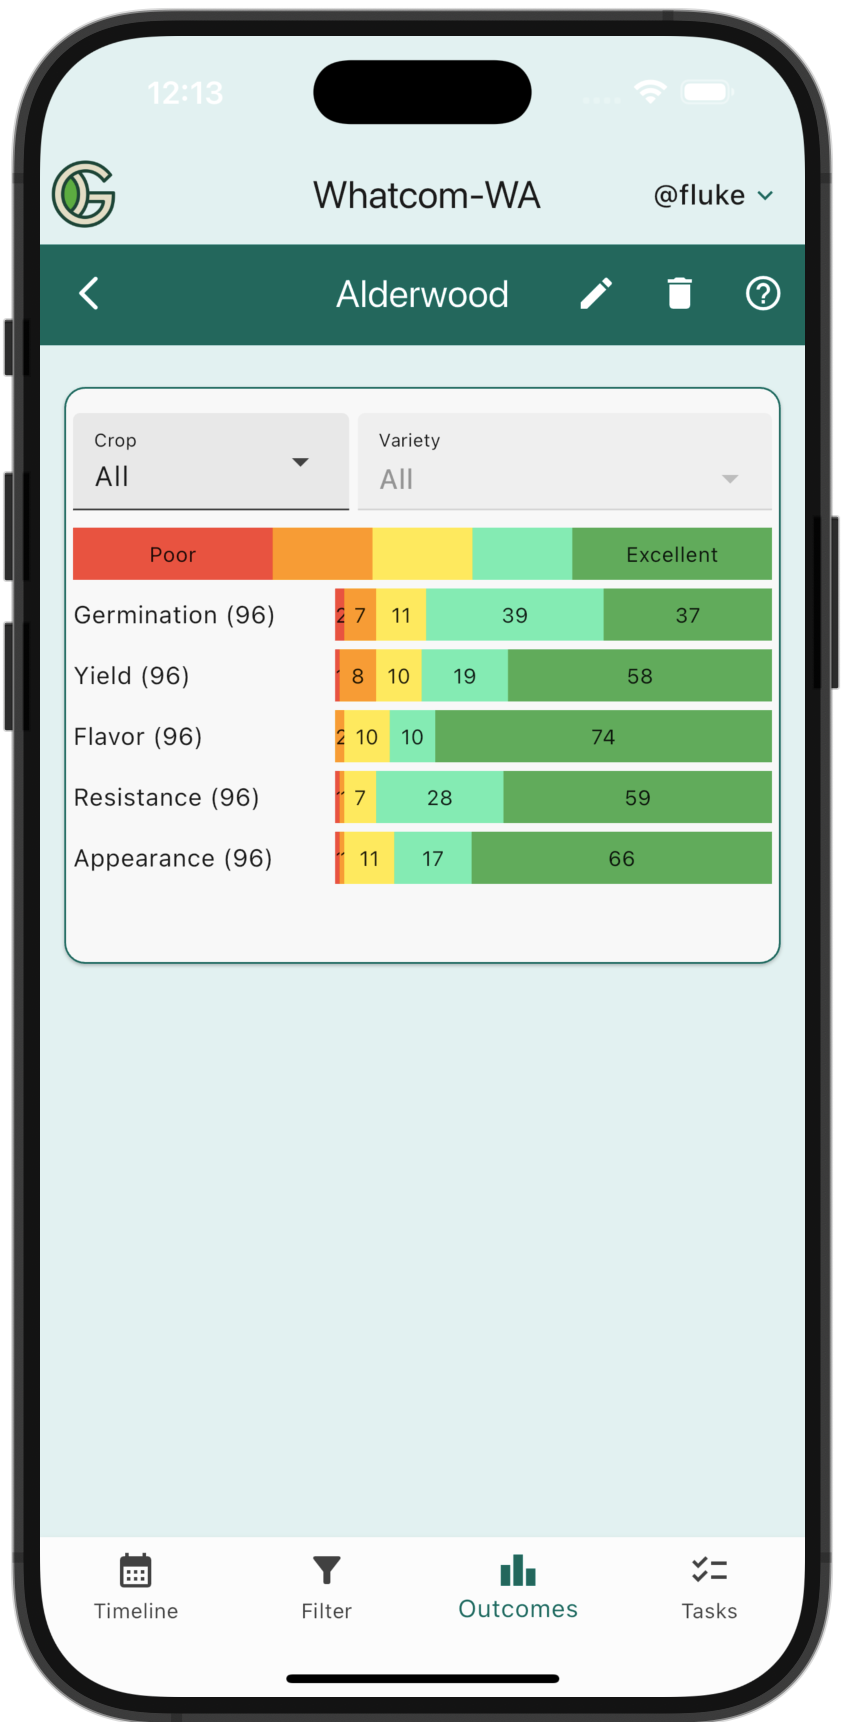
Crop: Select outcomes for a specific crop.
Variety: Select outcomes for a specific variety associated with the selected crop.
For more information on outcomes, see the Outcomes documentation.
Task view
Tap on the "Tasks" icon in the bottom navigation bar of the Garden Details screen to display the Tasks view.
Tasks are automatically created when you define timings for a planting, such as its start date, transplant date, pull date, and so forth. For example:

For more information on Tasks, see the Tasks documentation.
Garden Index
Navigate to the Garden Index screen by tapping on "Gardens" in the Drawer. The Garden Index screen provides access to all Gardens in the Chapter.
Here is an example Garden Index screen:
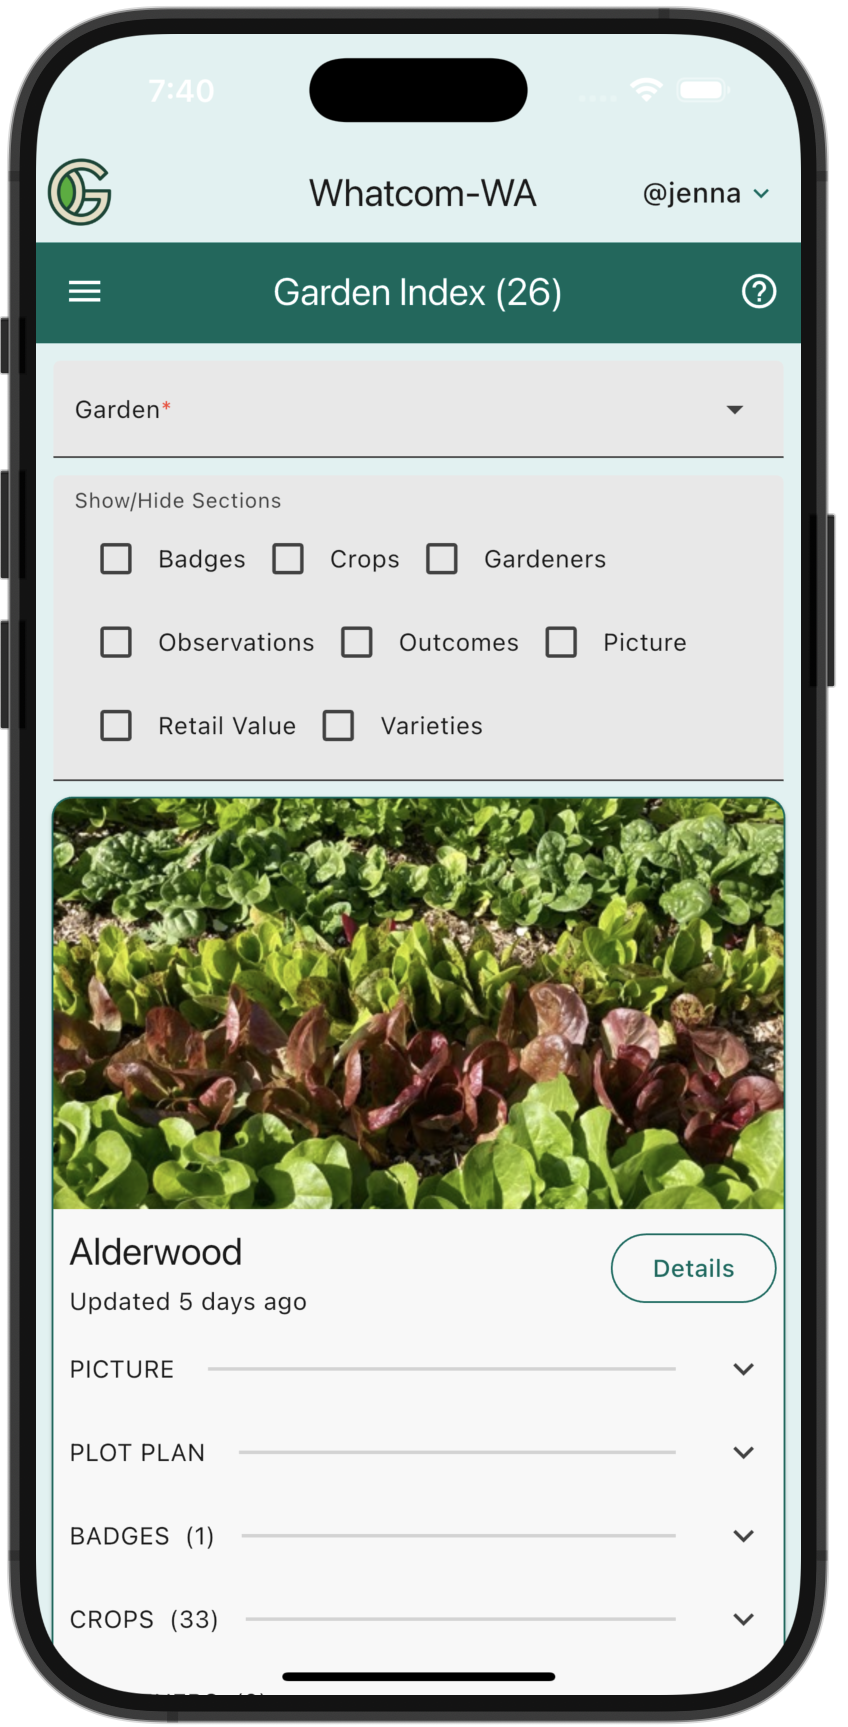
Use the Garden pulldown menu to quickly access a specific Garden rather than scrolling. The Sort By pulldown menu allows you to sort the list of gardens by various criteria, including name, number of Crops, number of Gardeners, and so forth.